Services
Rockstor supports many services that are necessary or useful in a storage system. Service management, i.e. turning on or off, and configuration can be done via the System - Services page of the Web-UI. On that Services page, all services and their current state are displayed.
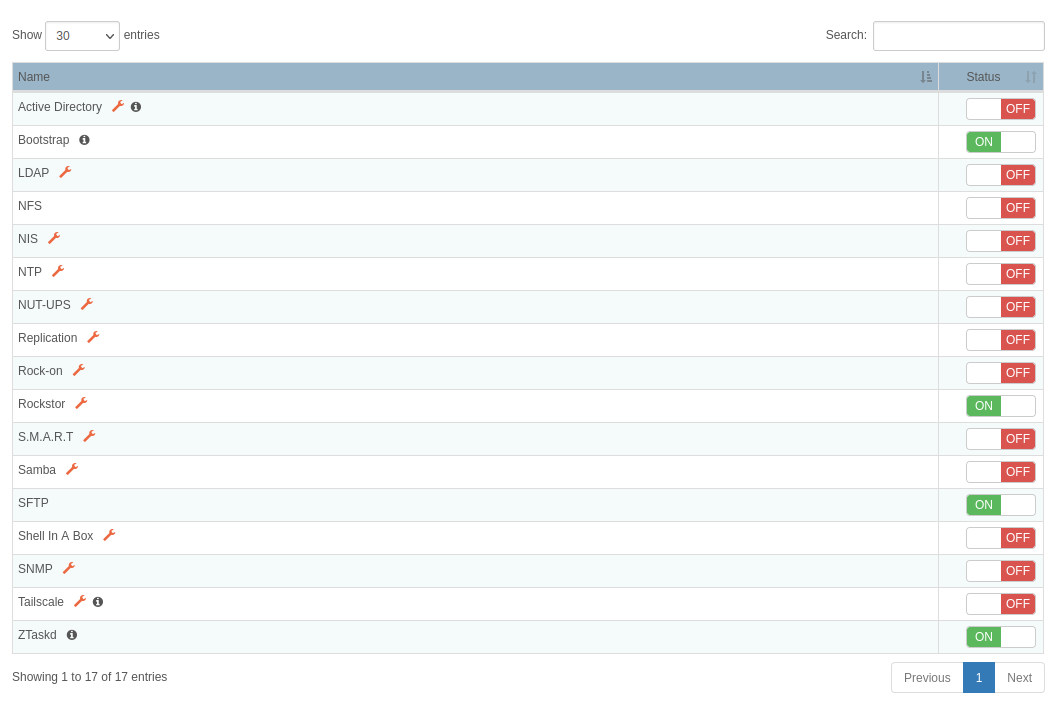
To start or stop a service, click its respective ON or OFF buttons.
Some services need to be configured before they can be turned on. To access the configuration page for a service, click the wrench icon next to the service name.
Please note that not all services are documented here as we are currently working on updating the documentation.
Active Directory (AD)
AD is a directory service to connect to an Active Directory domain. It must be turned ON in order to be part of the AD.
Before configuring the AD service, however, some preparations are required.
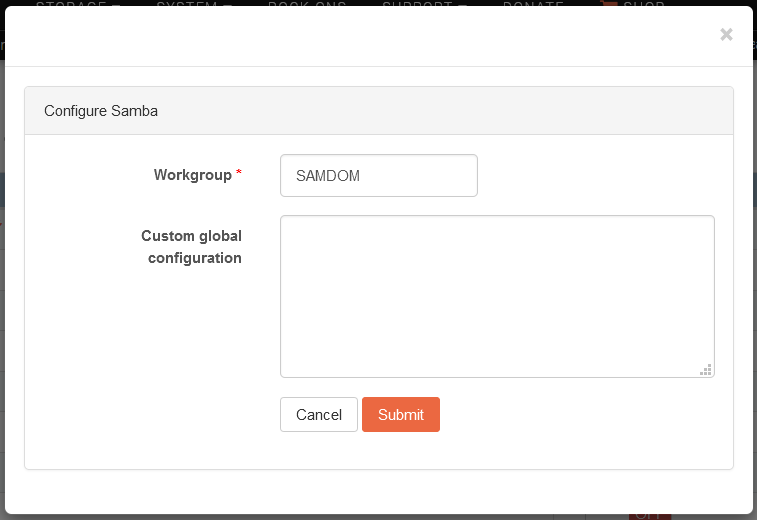
First, the Samba service must be configured with the AD domain realm as the workgroup.
For an AD domain of samdom.example.com, for instance, the Samba workgroup should be set as SAMDOM as illustrated below.
Note that while the Samba service needs to be configured, it doesn’t need to be turned ON.
Note
In recent versions, Rockstor takes care of setting Samba as described above when configuring the AD service itself. You should thus not need to manually follow the steps above. It is nevertheless a good idea to verify that these settings were correctly applied if you’re experiencing any problem with your AD configuration.
Next, as correct time synchronization with the AD domain is necessary for good performance, the NTP service should be configured and turned ON. Ideally, both the AD domain and Rockstor machines should use the same NTP time server.
Now that the NTP service has been setup and is running, the AD service can be configured. To do so, click on the wrench icon and fill in the form with the values corresponding to your AD domain.
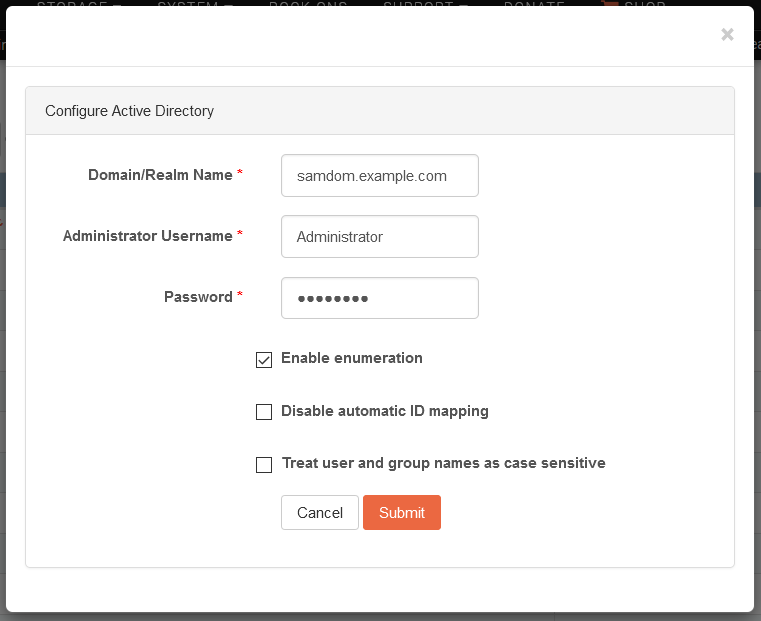
The individual fields of the form are described below.
Domain/Realm name: Specifies the desired Active Directory or Domain.
Administrator Username: Name of the user to use for the enrollment to the AD. This should be the AD’s administrator account.
Password: Password for the Administrator username.
Enable enumeration: Fetch and display all users/groups values. As this option can have a notable performance cost in some servers (with high number of users, for instance), this option is disabled by default. Note, however, that this option must be enabled for Rockstor to be able to list AD users and groups in the Web-UI. See SSSD FAQ for further details.
Disable automatic ID mapping: By default, the AD provider will map UID and GID values from the objectSID parameter in Active Directory. Check this option if you want to disable ID mapping and instead rely on POSIX attributes defined in Active Directory. See SSSD documentation for further details.
Treat user and group names as case-sensitive
Rockstor 4 relies on SSSD for the management of identities provided by AD.
As a result, one can edit /etc/sssd/sssd.conf to further customize the enrollment into an AD.
Upon submission of the AD configuration form, Rockstor will test the configuration settings by attempting to discover the AD domain and save the configuration if successful. If Rockstor cannot discover the AD domain, it will report the error back to the Web-UI; notably, verify that the AD domain can be resolved by name via DNS (see Red Hat Windows Integration Guide for further documentation).
Note that a successful configuration of the AD service does not enroll the system into the AD. To do this, the AD service must be turned ON. To leave the AD, simply turn the AD service OFF.
Bootstrap
The Bootstrap service is created by Rockstor and responsible, among others, for scanning storage devices and mounting Pools when the system starts. It is thus recommended not to turn it off.
Lightweight Directory Access Protocol (LDAP)
LDAP is a directory service to connect to a LDAP server. It must be turned ON in order to fetch users from the LDAP directory.
First, the LDAP service needs to be configured: click on the wrench icon and fill in the form with the values corresponding to your LDAP server.
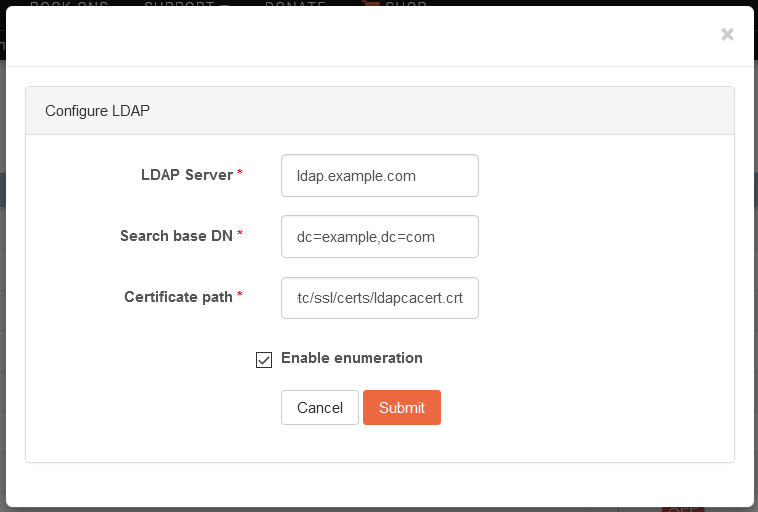
The individual fields of the form are described below.
LDAP Server: The hostname of the LDAP server.
Search base DN: Specifies that user information should be retrieved using the listed Distinguished Name (DN).
Certificate path: Absolute path to the TLS certificate of the LDAP server.
Rockstor 4 relies on SSSD for the management of identities provided by LDAP.
As a result, one can edit /etc/sssd/sssd.conf to further customize the connection to the LDAP server.
Note
The LDAP implementation is an area under active development. As a result, we are seeking feedback from users on further customizations and settings to implement in Rockstor Web-UI. Please visit our friendly forum to share your feedback or provide input on further LDAP expansion.
Note that a successful configuration of the LDAP service does not connect the system to the LDAP server. To do this, the LDAP service must be turned ON. To disconnect from the LDAP server, simply turn the LDAP service OFF.
NFS
Rockstor uses Linux NFS server to support exporting Shares to remote clients via NFS. Custom NFS configuration is not supported, but the service must be turned on in order to export shares. See the Network File System (NFS) section for details.
Network Information Server (NIS)
NIS is a directory service to connect to a NIS server.
To configure NIS, click on the wrench icon and submit the form with appropriate values as shown below.
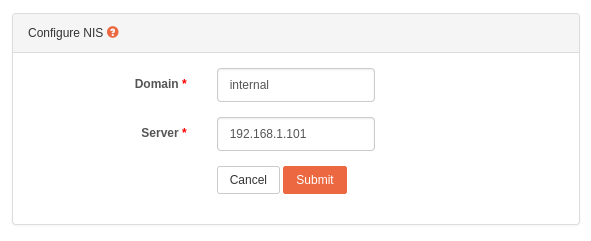
Domain: NIS domain.
Server: IP address of NIS server.
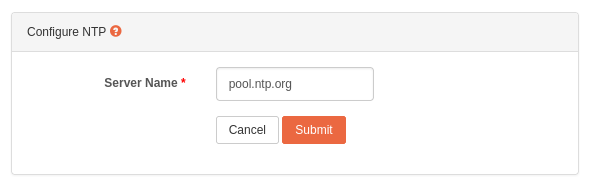
NTP
NTP maintains system time in synchronization with Internet standard time server. This service must always be turned on.
To configure NTP, you can specify the address of an Internet standard time server in the NTP configuration page.
NUT-UPS
A (currently Beta) Network UPS Tools-based service to orchestrate graceful system shutdown in the event of a power outage. Please see our: UPS / NUT Setup section for more details.
Replication
The Replication service leverages Btrfs send & receive features to replicate Shares to other Rockstor appliances (see Replication for more details). This can be used, for instance, to asynchronously and automatically replicate important shares on another Rockstor system. To use this feature, first configure the Replication service by clicking the wrench icon next to its name.
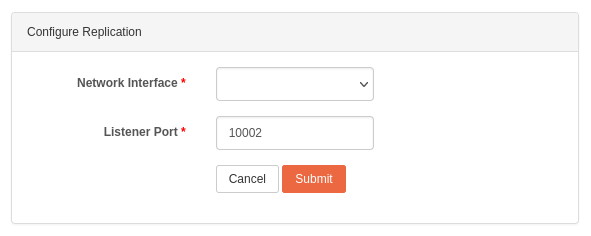
Network Interface: select the network interface to be used by the listener.
Listener port: select the port to be used by the listener. You can choose any unused port number between 0 and 65535.
When ready, click on the Submit button to save changes.
Rock-Ons (Docker plugin system)
Please see Rock-ons (Docker Plugins) for an introduction to Rockstor’s Docker-based plugin system.
Rockstor
The network interface and the port used to access Rockstor’s UI itself can also be customized. To do so, click the wrench icon next to the service name, and the change the settings as desired:
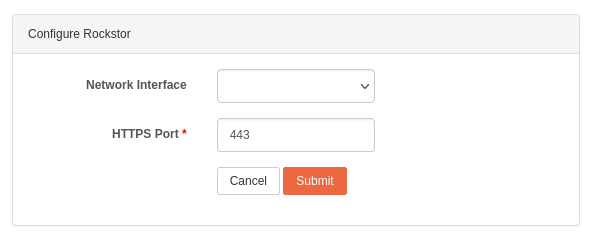
Network Interface: select the network interface. If left blank (default), it will listen on all interfaces.
HTTPS Port: by default, Rockstor is accessible on port 443 but you can change it to another port if desired. Note that the port must be unused, and between 0 and 65535.
When ready, click on the Submit button to save changes and Rockstor will automatically restart. It should thus become accessible again momentarily.
Warning
Understandably, you may need to change the URL used to access Rockstor’s webUI depending on the changes (such as using a different port).
S.M.A.R.T.
S.M.A.R.T stands for Self-Monitoring, Analysis, And Reporting Technology and Rockstor uses the tools provided by the Smartmontools project to interface with the attached hardware that supports this technology. See our S.M.A.R.T how-to for a comprehensive view of S.M.A.R.T. use in Rockstor, and the Configure Monitoring section for instructions on how to configure it.
Samba
Rockstor supports making shares available to SMB and CIFS clients via the Samba software suite. Samba is the recommended way to access your Rockstor shares from a Windows client, but can also be used to access shares from a Linux or MacOS client. See our Accessing Shares from Clients section for more details.
Before turning on the Samba service, it must be configured. To do so, simply click on the little wrench icon:
The Samba service configuration window will then open:

Workgroup is the only required setting. This should be set to the Windows NT domain or the workgroup name. Unless changed, the default domain name for a Windows machine is
WORKGROUP.The Custom global configuration (optional) box allows you to enter any custom samba setting needed to customize the Samba service to your needs. The possible options are thus all those supported by Samba in its
smb.conffile. See the Samba wiki for a full list of options and their documentation.
When ready, press the Submit button to save the configuration changes.
Once you are done configuring it, the Samba service can now be turned ON by toggling the ON/OFF switch located to its right.
You can now proceed to Create a Samba Export of a Share and access shares from clients.
SFTP
SFTP stands for Secure File Transfer Protocol and is essentially FTP over SSH. In Rockstor, user-owned shares exported via this method are mounted within a minimal chroot environment for enhanced security. Please see our Secure File Transport Protocol (SFTP) section.
Shell In A Box
The Shell In A Box service provides access to a System Shell directly from your browser. To use this feature, you must first configure it by clicking the wrench icon next to its name.
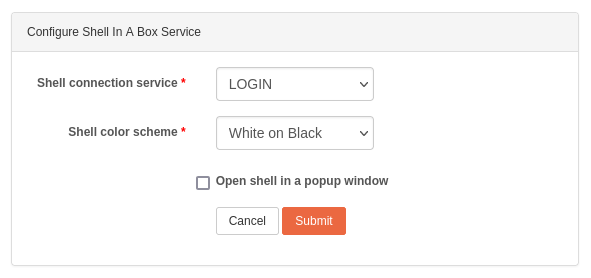
Shell connection service: access the resulting System Shell either by LOGIN (default) or via SSH. LOGIN will require you to elevate your priviledges if you need to run a command as
root. SSH will allow you to directly connect asrootbut is less secure for the system.Shell color scheme: You can use either White text on a Black background, or Black text on a White background.
Open shell in a popup window: if checked, the System Shell will open in a new window (please remember to allow popups in your browser). By default, the System Shell will be displayed within Rockstor’s UI.
When ready, click on the Submit button to save changes, and the Shell In A Box service can then be turned on. You can now click on the “System Shell” button in the header to access the System Shell.
SNMP
SNMP is an enterprise monitoring facility. Turning on this feature will activate the SNMP agent on your Rockstor appliance. To configure this service, click the wrench icon next to its name.
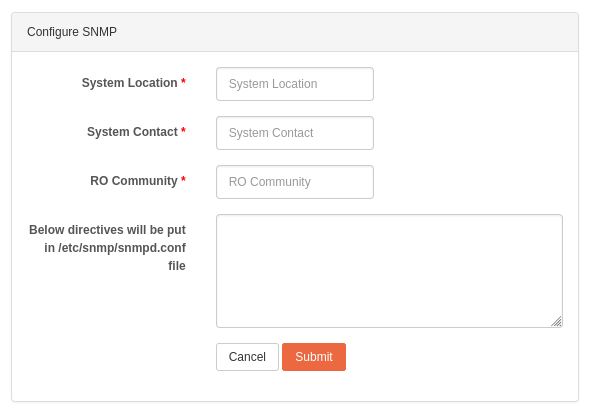
System Location: Set the system location (corresponds to the
sysLocationsetting).System Contact: Set the contact information for the administrator (corresponds to the
sysContactsetting).RO Community: specify a community name that will be allowed read-only access (corresponds to the
rocommunitysetting).
Any additional customization can optionally be manually entered in the text box located at the bottom of the configuration window.
All settings specified in this box must be entered one per line, and will be added to the snmpd.conf configuration file.
When ready, press the Submit button to save the configuration changes. The SNMP service can now be turned ON by toggling the ON/OFF switch located to its right.
Tailscale
From Rockstor version 5.0.5-0 Tailscale is natively supported. However the required Tailscale program is intentionally NOT pre-installed.
Warning
A Tailscale install is required before configuration or use.
Tailscale is a private mesh VPN using Wireguard allowing, for instance, to connect remote machines as if they were on the same private network. This service can thus provide an easy solution to remotely access your Rockstor instances and/or their File sharing.
Note
A Tailscale account is required if you would like to use the Tailscale service. Please refer to Tailscale.com for further information and instructions.
Before turning on the Tailscale service, it must be configured. To do so, simply click on the little wrench icon and a configuration window will open:
Warning
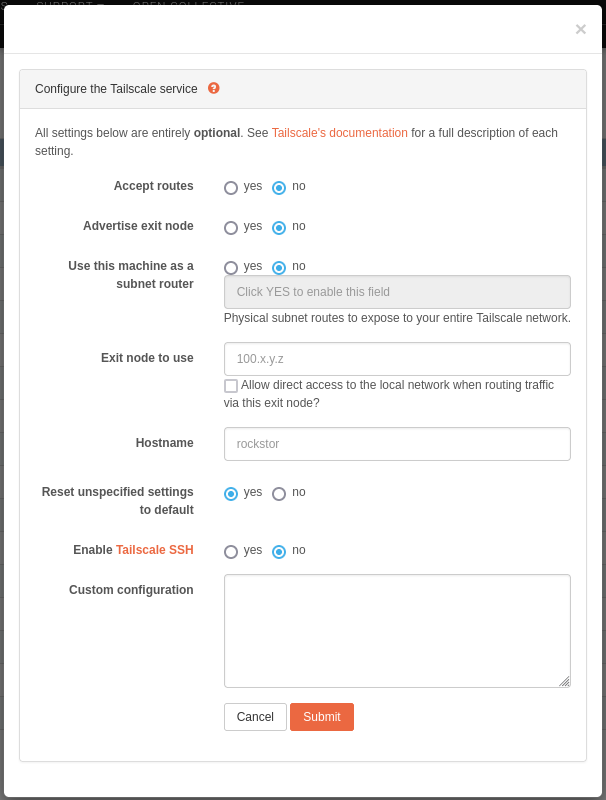
All settings on this configuration page are optional and set to Tailscale’s defaults. If you do not need to customize Tailscale, you can simply click the “Submit” button without making any changes.
In this window, Rockstor presents a set of commonly-used customization options for Tailscale.
If you need to customize a setting not listed in this form, you can manually enter the parameters in the Custom configuration text box at the bottom of the window. See below for more details and instructions.
For convenience, the list below includes the corresponding tailscale up flag; you can thus lookup the official reference for further details if needed.
Accept routes (flag:
--accept-routes): Accept subnet routes that other nodes advertise.Advertise exit node (flag:
--advertise-exit-node): Offer to be an exit node for outbound internet traffic from the Tailscale network.Use this machine as a subnet router (flag:
--advertise-routes): If enabled, this machine will act as a subnet router and expose the listed physical subnet routes to your entire Tailscale network.Exit node to use (flag:
--exit-node): Use another machine as an exit node. You can provide a Tailscale IP address or machine name.Hostname (flag:
--hostname): Provide a hostname to use for the device instead of the default’s machine hostname. This must contain only alphanumeric characters; underscores will be automatically changed to hyphens (this reproduces Tailscale’s own behavior).Reset unspecified settings to default (flag:
--reset): Recommended. If set to “No”, you may encounter some issue with incompatible options from previous settings.Enable Tailscale SSH (flag:
--ssh): If enabled, this machine will run a Tailscale SSH server.Custom configuration: This box allows you to enter any custom
tailscale upparameter. The possible options are thus all those supported as described in the official reference. These must be entered one per line as if they would be entered at the command line. Note that if a parameter entered here is already defined by the form above, it will be considered a duplicate and ignored (the setting defined in the form above will take precedence).
When ready, press the Submit button to save the configuration changes.
Before being able to turn ON the Tailscale service, you need to authenticate your Rockstor machine to your Tailscale account. Once configured, Rockstor will thus display a “Login” button that, once clicked, will open a new browser tab/window to complete the authentication process. When that process is successfully completed, the Tailscale service on your Rockstor machine should automatically turn ON and your machine will then be part of your Tailscale network.
Once the Tailscale service is configured, you will see a new tun device named tailscale0 in the list of network devices on the System > Network page. This device will appear only after the Tailscale service is configured, but whether or not the latter is ON or OFF. Once the Tailscale service is ON, however, a new connection using this tun device will be created; this connection is named tailscale0 and is entirely managed by the Tailscale package. As with any other network connection, you can monitor its activity using the Network activity Widget of Rockstor’s Dashboard.
ZTaskd
Ztaskd is a service required by Rockstor for running background tasks such as Pools scrubs or balances. It it thus recommended not to turn it off.
To start or stop any service, click the corresponding ON or OFF button
