Network
Rockstor supports basic network configuration from the Web-UI. Network interfaces can be configured with DHCP or Static IP configuration. Configuration using the Web-UI is intuitive and self guided with helpful tooltips for each input field.
To view or configure network, navigate to Network Interfaces screen under the System tab. Rockstor fetches the current state and lists all ethernet devices and connection information on this screen.
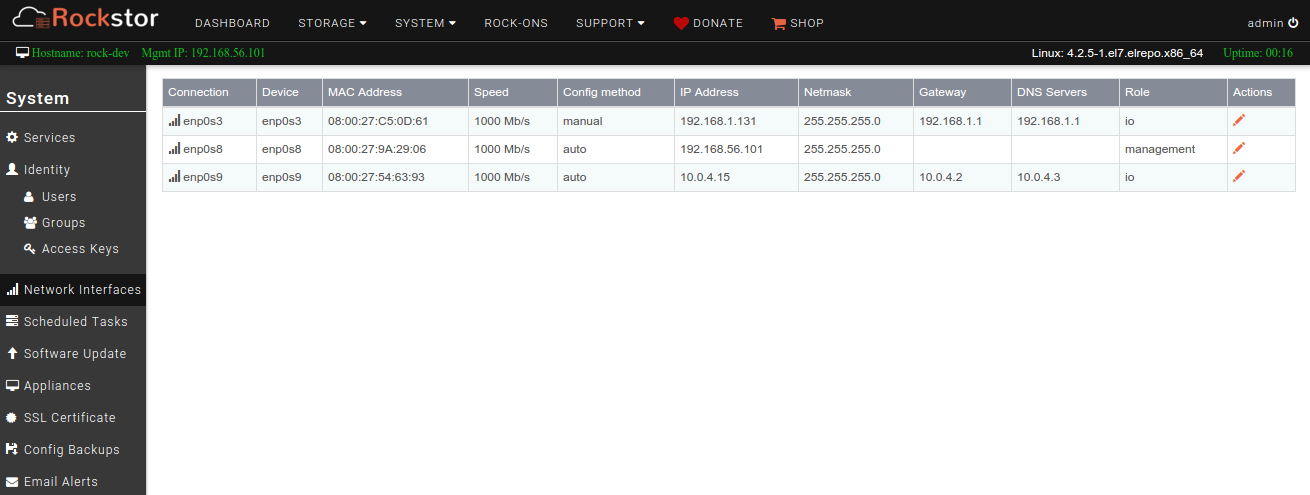
Clicking on a connection name will provide additional information on its member device(s), including its name, type, MAC address, MTU, and Status code. For convenience, all network devices detected on the system are listed with their respective details in the table at the bottom of the page. If the connection is a rocknet (see Docker network (Rocknet)), the information will include the attached containers and their rock-on (if any).
Adding a network connection
To add a network connection, simply click on the Add Connection button.
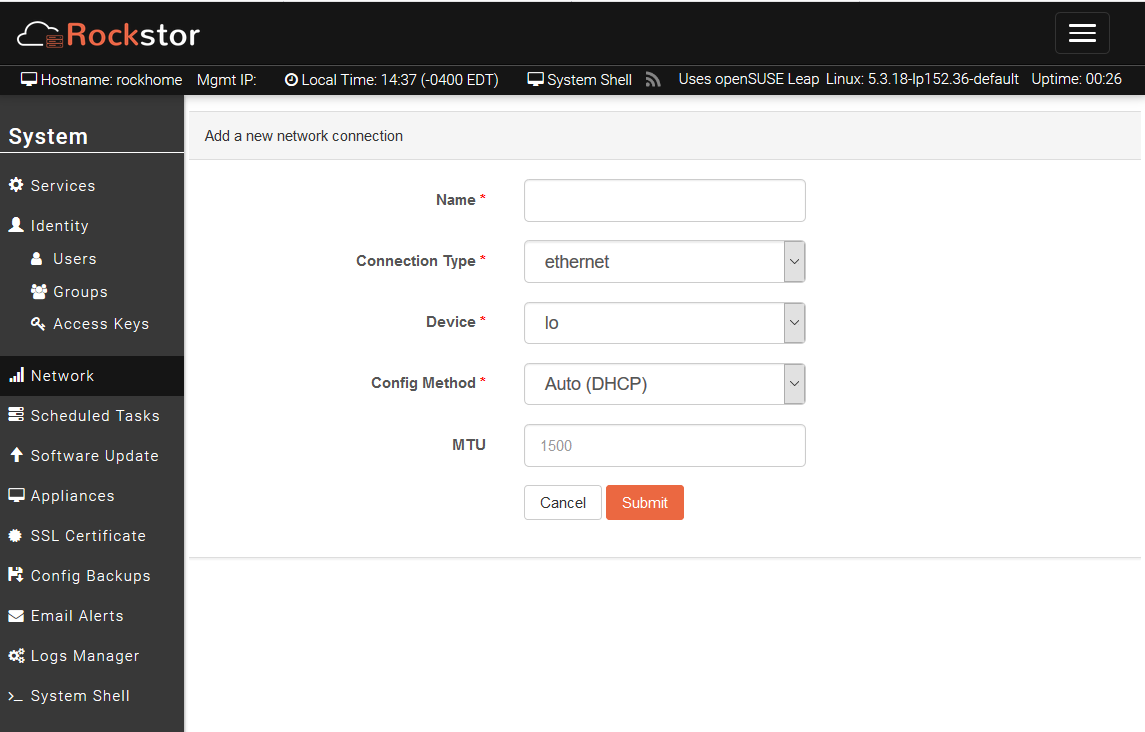
The following types of connection can be chosen:
Ethernet
Team
Bond
Docker
Docker network (Rocknet)
Choosing the docker type will create a user-defined docker bridge network (referred to as rocknet in Rockstor). Such docker bridge networks (rocknets) differ from the default docker network and allow for advanced customizations of rock-ons and communication both within and between rock-ons. Rocknets can, for instance, be used to connect several rock-ons with each other, granting external access to some, while preventing it from others. As a result, docker networks (rocknets) are ideal ways to connect a front-end container to a back-end database container, or connect multiple rock-ons together hidden behind a reverse-proxy rock-on. Please see Docker’s documentation for further details on the different features and settings of such networks.
Note
Please see Joining Rocknets for how to connect rock-ons.
Re-configuring the Network
To alter the network configuration click on the pen icon next to the connection Name. Please be aware though that altering the network configuration of the interface over which you are currently communicating with Rockstor can be problematic as once submitted you will have to manually change the IP used to access Rockstor’s Web-UI.
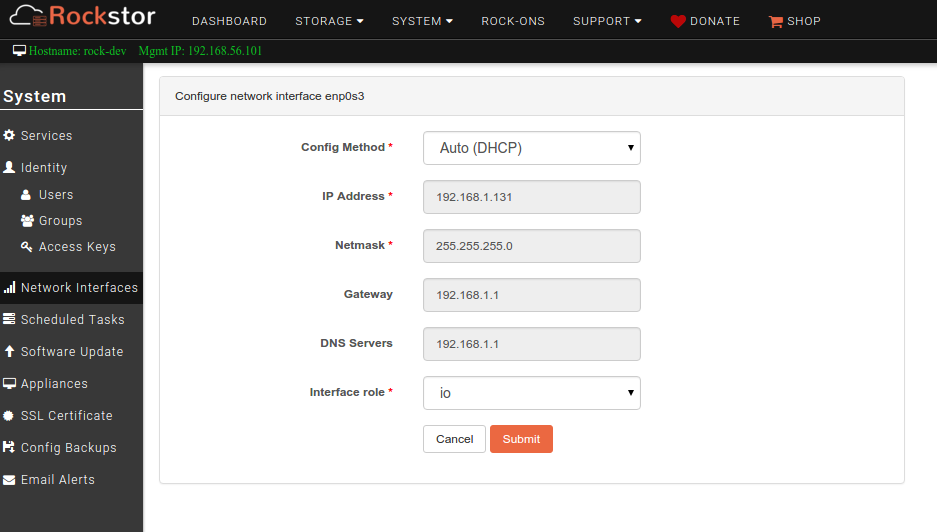
Auto (DHCP)
DHCP is a very common and easy way to configure a network interface. This is the default/recommended method for home-office/small-office type deployments. Just select Auto (DHCP) in the Config Method dropdown and submit. An example of this default configuration is shown below.
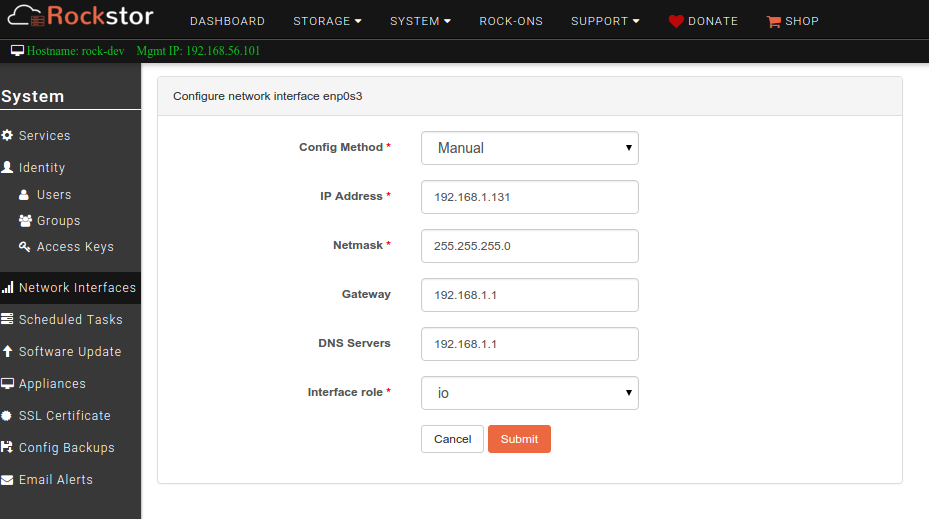
Manual (Static IP)
It is more common to use Static IP configuration in commercial installations. Select Manual in the Config Method dropdown and provide appropriate input. The following is an example of a Static IP configuration.
Network Bonding and Teaming
Network bonding and teaming can be configured from the Web-UI. While further documentation will be coming here soon, please visit our friendly forum for questions and resources in the meantime.
Implementation details
NetworkManager is used to configure and manage connections. For more information see implementation details.
