Network File System (NFS)
Rockstor uses Linux NFS server to support exporting Shares to remote clients via NFS. Both NFS v3 and v4 are supported. UID and GID mapping for the exported shares can be handled by manually creating users or by using directory services like Lightweight Directory Access Protocol (LDAP), Network Information Server (NIS), or Active Directory (AD). While accessing a Share exported via NFS is straightforward from a Linux or macOS client, we recommend using Samba/CIFS if the Share is to be accessed by a Windows client. See our Accessing Shares from Clients section for further guidance.
To manage NFS exports, click on NFS under the Storage tab in the Web-UI. If there is any export already defined, they are displayed in a table. If there are large number of exports, the table is paginated and the current page number is displayed below the table along with Previous and Next buttons.
The display can be sorted by individual columns by clicking small up/down arrows displayed in each column header.
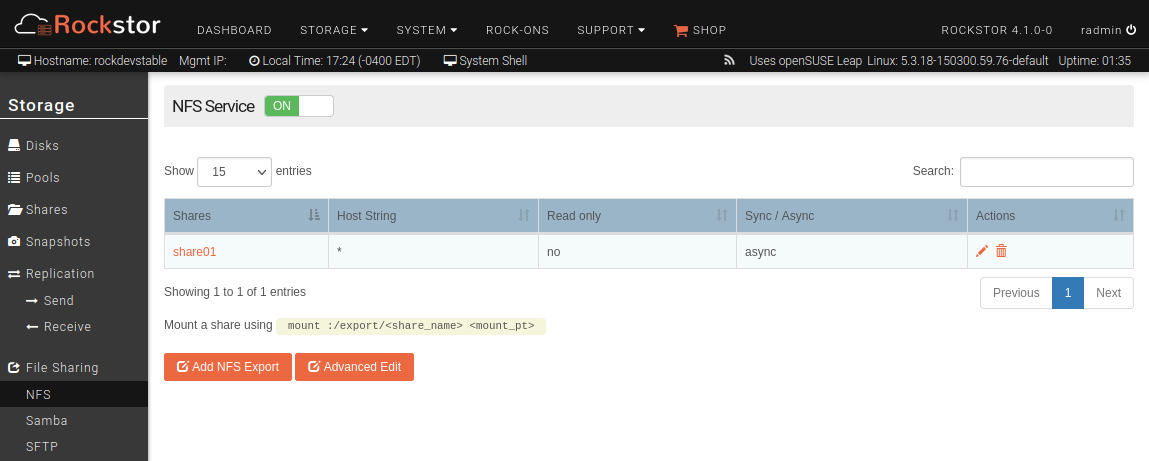
Below are the main operations possible from the NFS view, which operate on one or more shares and is a convenient way to manage exports for the entire system.
Add NFS export
A single NFS export represents a unique combination of clients to which a set of shares are made accessible via chosen options. Go to the NFS view under the Storage tab of the Web-UI and click on Add NFS Export button to add a new NFS export.
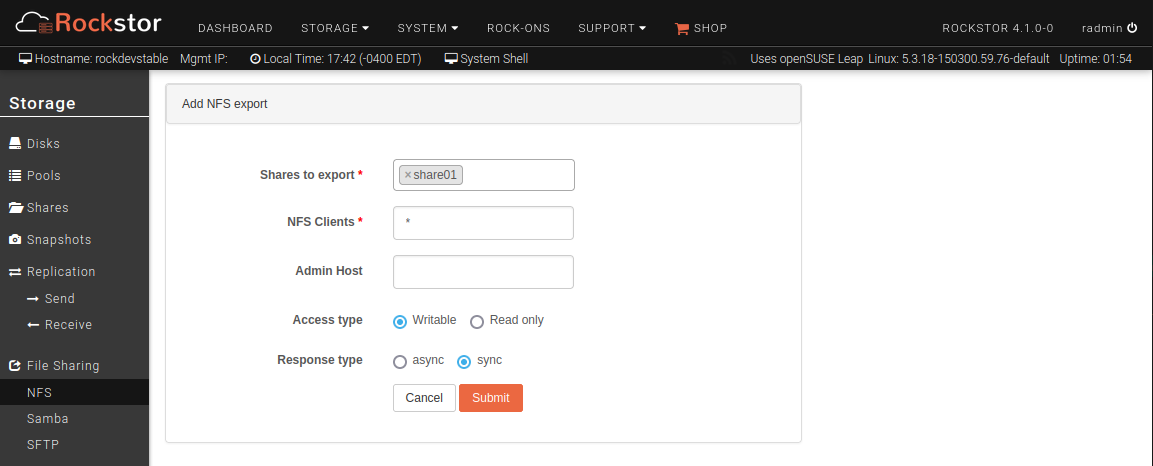
Various fields of the form are explained as follows.
Shares to export: Choose one or more shares to be exported.
NFS Clients or Host String: This field can be a single host, comma separated host names, hostnames with wildcards or IP networks. This field can be complex. For a detailed explanation, read the manpage of exports.
Writable: Choose ro to make the share(s) available read-only or rw for read-write.
Sync: Sync (synchronous) mode is the default and the norm. For asynchronous IO, select async. See the manpage of exports for more information.
Edit NFS export
An NFS export can be edited to add or remove a Share or allow different set of clients to be able to access it. In the displayed table of NFS exports under the NFS view of the Web-UI, click on the edit icon of the corresponding export to edit.
Delete NFS export
In the Web-UI, click on the Storage tab to enter the main Storage view. Now click on NFS in the left sidebar to enter NFS view. In the displayed table of NFS exports, click on the trash icon of corresponding export to delete the NFS export; note that this does not delete the Rockstor Share.
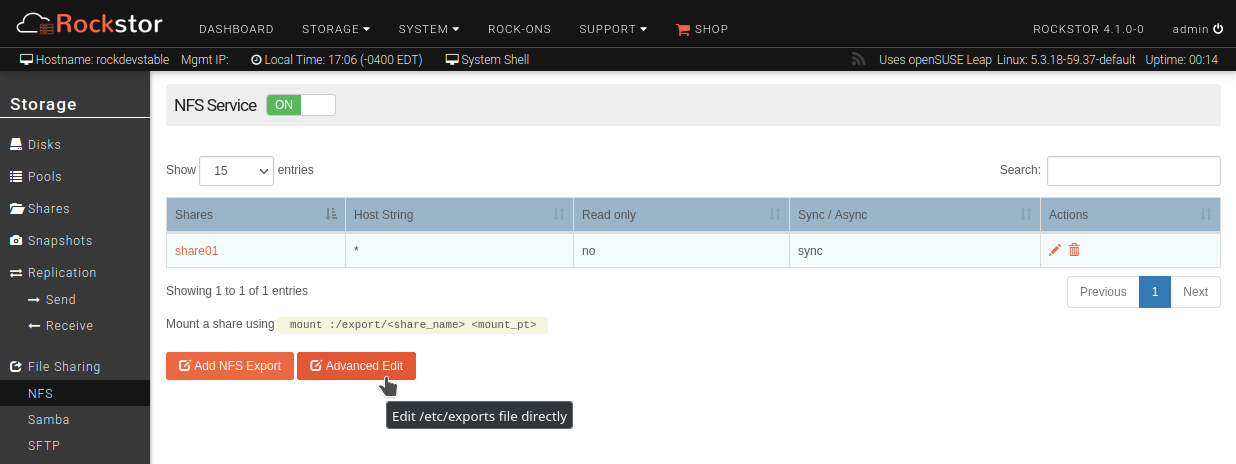
Advanced edit
If you would like to use further customization than offered using the Add NFS export button, click on the “Advanced Edit” button.
The top part of the resulting page (see below) lists the NFS exports that have been already created
using the Add NFS export button. The bottom part of this page, however,
allows you to manually add an NFS export to the /etc/export file. As a
result, one or more NFS exports can be added by entering it/them as if you were
directly editing this file. In the example below, we create a new NFS export of
the share02 Share, with the rw,sync,no_root_squash,no_subtree_check
options.
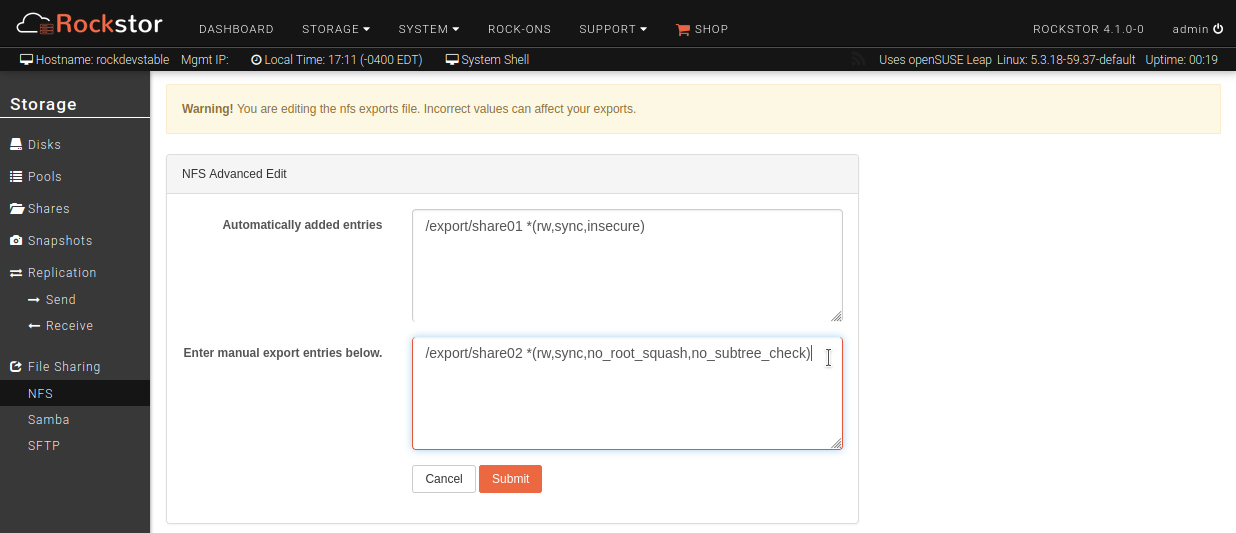
Click the Submit button, and the new NFS export(s) will be created.
Accessing NFS shares
From Unix/Linux
Some Linux distributions offer a graphical tool to streamline the connection to an NFS export. In openSUSE Leap, for instance, the YaST configuration tool can be used to setup access to an NFS export; see openSUSE’s documentation for more details. Please refer to your distribution’s documentation to know if you can use such graphical tools.
Across all Linux distributions, however, the access to an NFS export can be setup at the command line. In the example below, we will assume a Rockstor Share named share01 has already been exported via NFS as described in the Add NFS export section above. We will also assume the Rockstor machine can be resolved in the network under the hostname rockstable. Note that in the examples below, the Rockstor’s machine IP address can be used instead.
First, from the Linux client, we can verify that we can see all NFS shares exported by the Rockstor machine:
you@laptop:~> sudo showmount -e rockstable
Export list for rockstable:
/export/share01 *
We can see here that the share01 NFS export is correctly detected. We can thus
proceed with accessing its content. First, we need to create a directory on the client
machine (Linux laptop) that will be used to mount the NFS export.
you@laptop:~> mkdir -p $HOME/share01
Now, we proceed with mounting the NFS export to this directory:
you@laptop:~> sudo mount rockstable:/export/share01 $HOME/share01
The Rockstor Share named share01 is now accessible on the Linux laptop at the
$HOME/share01 path.
If you would like your Linux laptop to automatically mount this NFS export at startup,
you can manually edit your /etc/fstab file to contain the following line:
rockstable:/export/share01 $HOME/share01 nfs4 rw 0 0
Note
The above can take many important options to control the behavior of this NFS mount. See the nfs mount manpage for further details.
From macOS
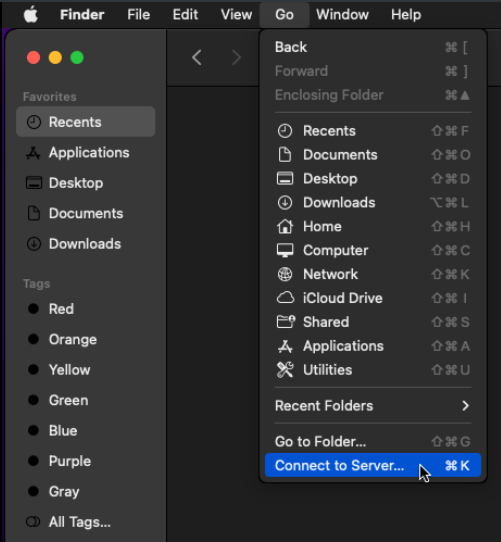
From a macOS client, an NFS export can be accessed directly from Finder. First, open Finder and click on Go > Connect to server:
Then, enter the path to the NFS export as nfs://rockstable/export/share01; note
that the IP address can be used instead of the hostname. This should look as follows:
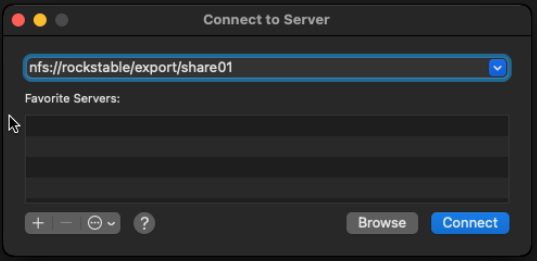
Click Connect and the NFS export will now be available directly in Finder.
Alternatively, an NFS export can be mounted manually at the command line following the same instructions listed above.
