Secure File Transport Protocol (SFTP)
This is a basic method / protocol for transferring data based on the ancient and insecure File Transfer Protocol (FTP), only updated to be more secure. The internal system used by Rockstor is that included as a subsystem within the openssh server.
Unlike other file sharing systems like Samba/CIFS, SFTP has no built-in discovery or service publishing components. This makes it a simpler system but one that requires a little more effort to connect with. Most notably, it is required that you manually enter Rockstor’s hostname or IP address on the clients that wish to connect.
The Rockstor SFTP System
By default, no user other than root are allowed to login via ssh or use SFTP.
This restriction improves security but means there are certain conditions that must be met to gain SFTP access to a Rockstor share.
the SFTP user must be a Rockstor user
the SFTP user must also be the owner of an exported SFTP share
These restrictions make Rockstor’s SFTP implementation more suited for individual storage needs as opposed to a shared storage area accessed by multiple users. In the following example, we will setup a secure share for use by a single user, i.e. for secure file access/storage across client platforms.
Note
The share(s) owned by the SFTP user will be mounted within a chroot environment; internally this is located at /mnt3/<username>/<sharename>.
Creating a SFTP Share
In order to establish a SFTP share, it is first necessary to have a pre-configured storage pool, a share of this pool or part there of, and a Rockstor user to authenticate against this share. Finally, the share must be exported via the SFTP method. The following list details in the suggested order and gives links to the documentation on each of these steps.
Start with the User Configuration page and follow the Add a Rockstor user instructions to create a user to assign as owner of the share and use in the SFTP authentication process.
If you don’t already have a storage pool for your SFTP share, reference the Pools page, Creating a Pool section to create the pool that will contain the SFTP Share.
A Share of a storage pool area is then required, see Creating a share.
Finally this Share is exported via Add SFTP Export.
The following sections illustrate examples of the last 3 items in the above.
The SFTP Pool
The following example shows a general purpose rock-pool has been created.
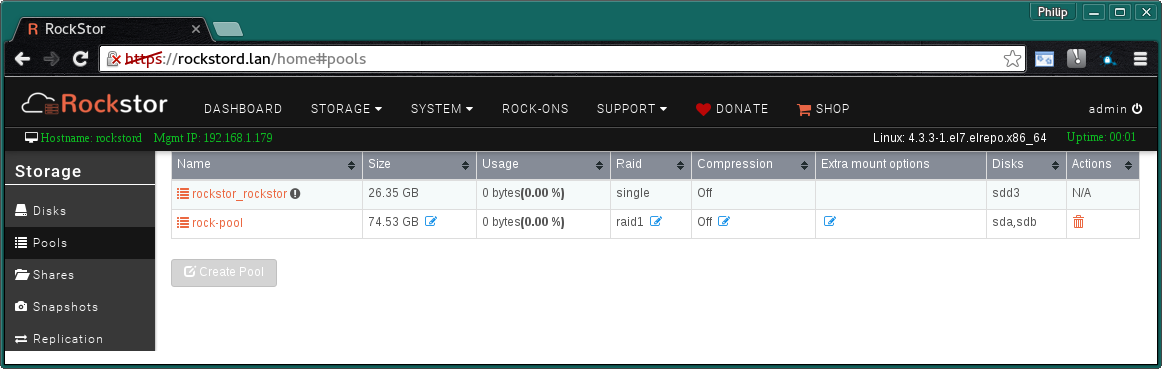
A Raid1 pool of 2 drives
The SFTP Share
Here, a Share has been created on the above rock-pool disk set.
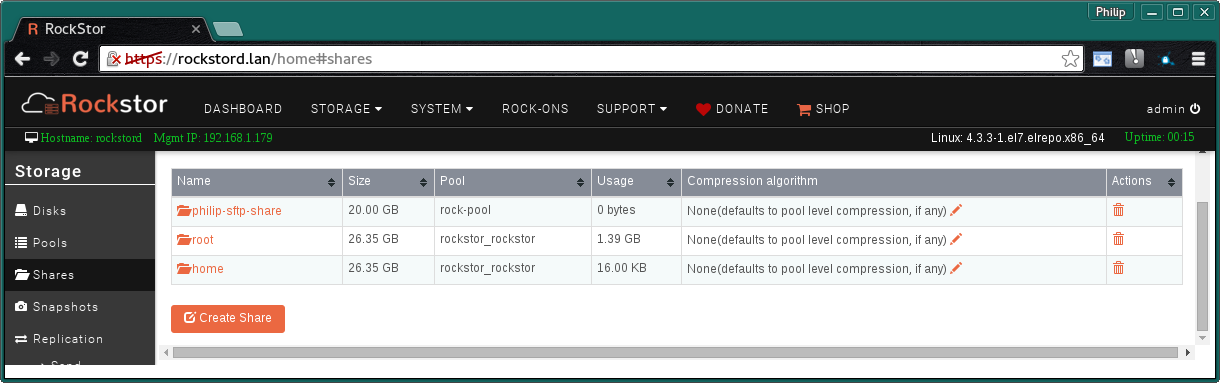
A 20GB share of the rock-pool resource.
Note the required setting of owner is set here to the intended user. This page appears when the share name is clicked on and the Access control tab is selected. An Edit button brings up the following display.
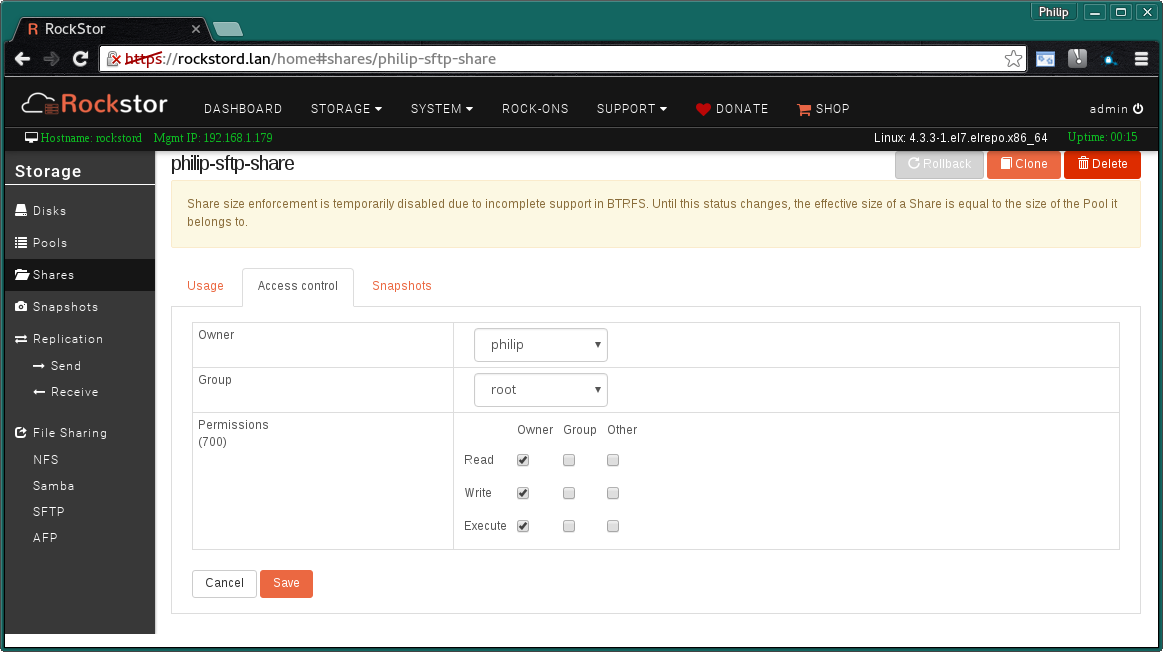
Please note the required setting of owner has to be a different user than root.
If not, then a warning will be given when attempting to create an SFTP export.
Add SFTP Export
Finally export the Share via the SFTP entry in File Sharing. This menu entry is available in the Storage section. Note that the SFTP Service must be ON, the default, for the configured shares to be available to the SFTP clients.
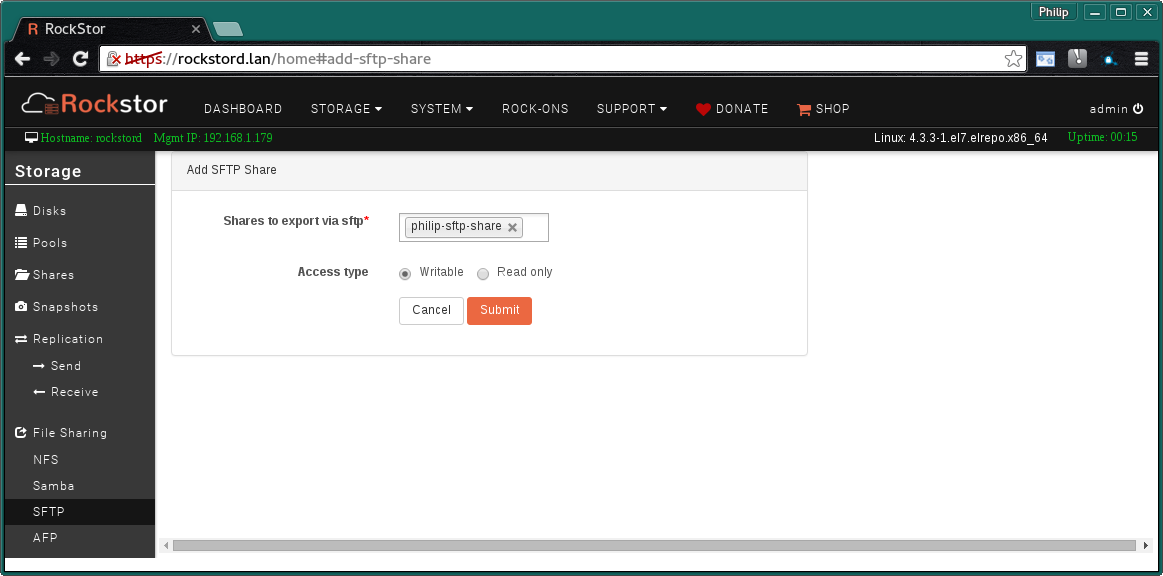
Note the Writable or Read only settings for this export option.
The resulting SFTP export is then displayed in summary form:
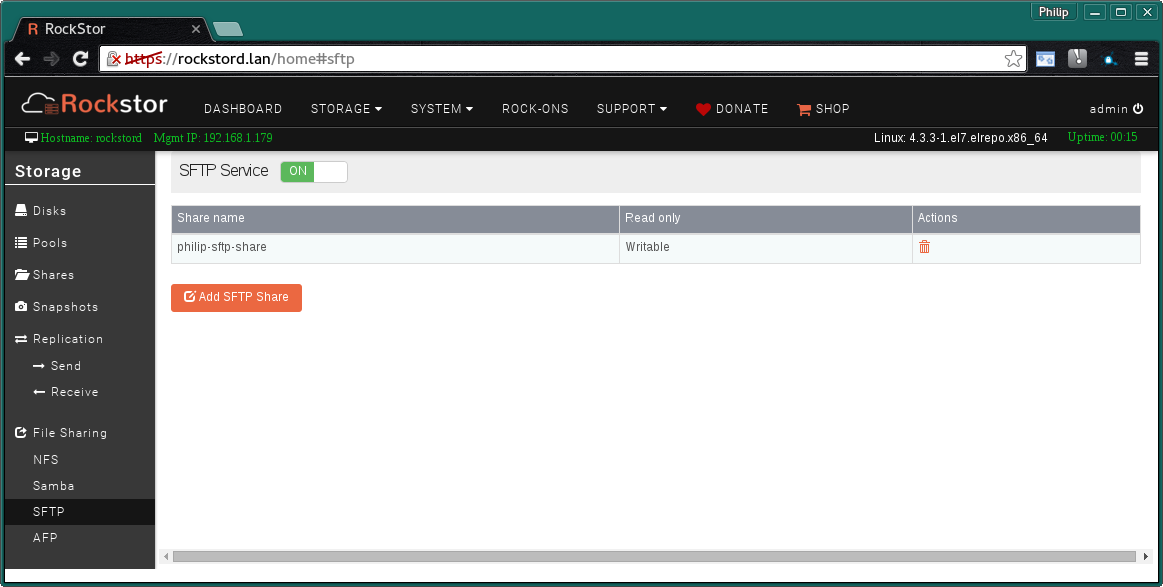
Note
N.B.: even if a share is writable by the user, the export “read only” option will take precedence.
Accessing a SFTP Share
Depending on your chosen operating system, your options to access an SFTP Share differ.
SFTP Access from Linux
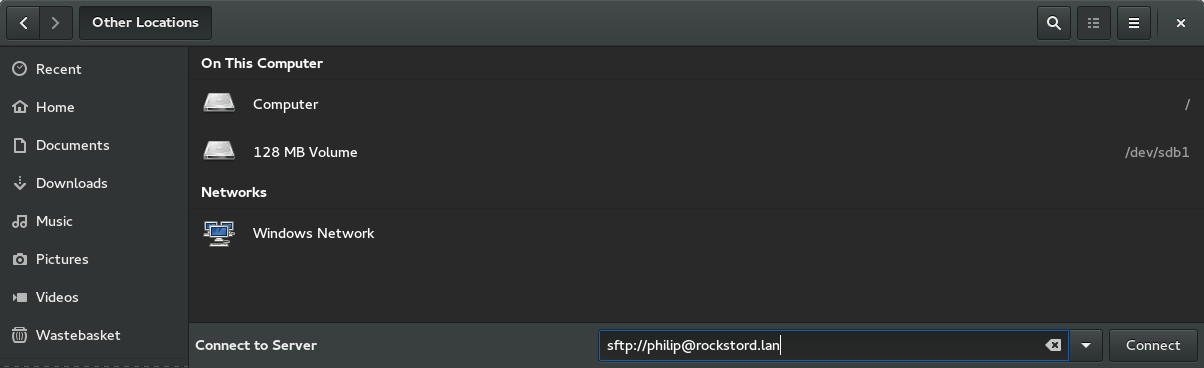
Most Linux desktop systems have SFTP capability built into their file managers. This is usually accessed either via a url entry such as in Nautilus, the gnome file manager, or by way of a form entry system such as in KDE. The typical URL that can be used in both desktop environments is as follows:
sftp://username@rockstor-ip-or-name
To access the above example share, the url would thus be:
sftp://philip@rockstord.lan
The following shows this url having been entered via the Other Locations option in Nautilus. This is akin to Ubuntu’s Unity Connect to Server. A similar facility is possible via KDE’s dolphin file manager.
And the consequent connection along with the associated eject icon.
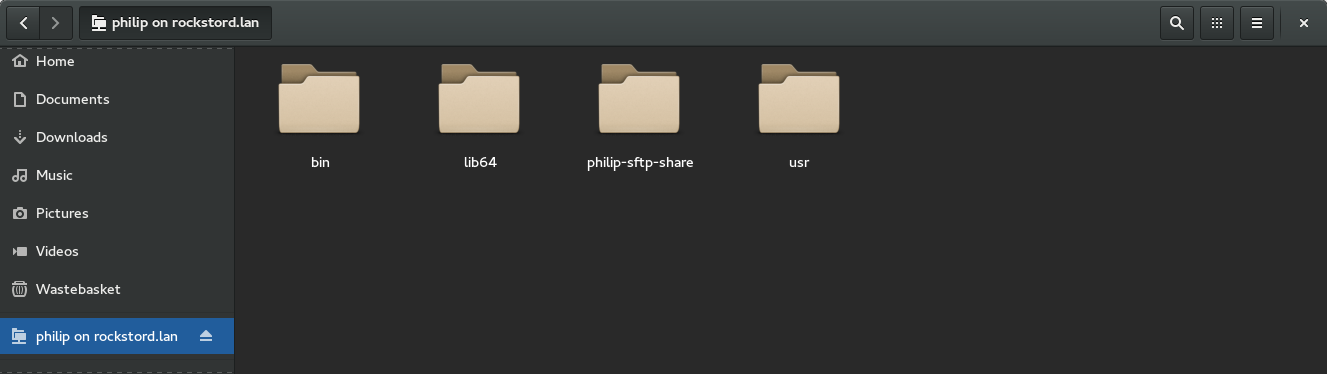
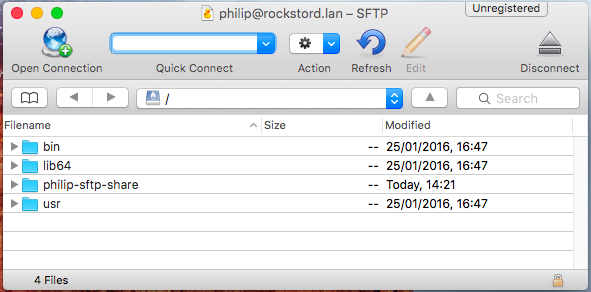
Here we see the minimal content associated with a chroot environment and the share or shares owned by this use; in this case the philip-sftp-share.
Once connected, the resource is available to other GUI programs via their respective open/save dialogues and the connection can be bookmarked to ease future access.
SFTP Access From OSX
A popular SFTP client program on OSX is Cyberduck. This is a particularly feature-full client available directly from the link given or if preferred via a paid version on the Mac App Store where updates will then be automated. Cyberduck is licensed under GNUv2 and is available for OSX 10.7 (Lion) or later.
A partner project by the same founding author of Cyberduck is Mountain Duck, which allows for drive mappings to be made in the Finder over a variety of protocols including SFTP.
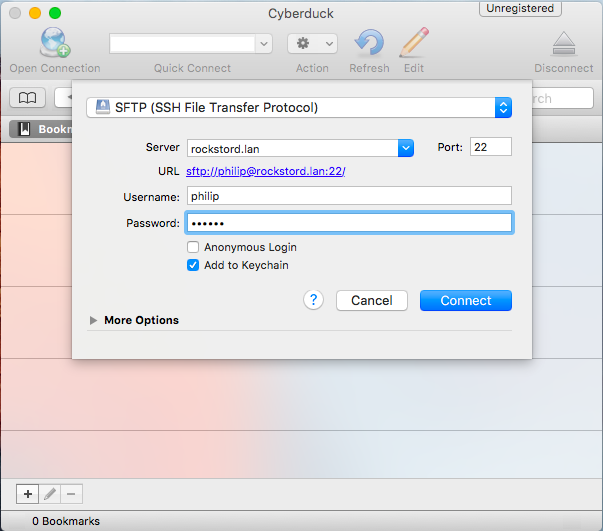
Here we see the dialog resulting from the Open Connection button filled out with the example used in this guide. Note the generated url in blue from the information entered. The 22 at the end of the url is required by some clients and is the default port used by SSH/SFTP.
The display once the above connection is made is shown below; note the eject icon to disconnect.
Finally, we see Cyberduck used to transfer the OSX screenshots used in this document via the example Rockstor share. A testfiles directory is also visible.
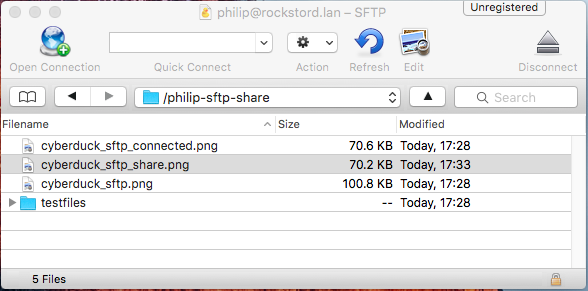
Note that Cyberduck supports drag and drop from the OSX Finder app.
SFTP Access from Windows
Most versions of MS Windows do not have a built-in ability to access an SFTP resource. The easiest solution to access an SFTP share from Windows is thus to use one of the many dedicated SFTP clients available.
As such, note that Cyberduck, as referenced in the SFTP Access From OSX section above, is also available for various versions of Windows.
A dedicated SFTP client application that has found favour in our forum is WinSCP which is GPLv3 Licenced.
SFTP Access From WinSCP
When you install WinSCP, it will ask you to pick your preferred interface: either the commander interface, or the explorer interface pictured below. The WinSCP recommendation is for Windows users to choose the explorer interface. If you have worked with FTP clients in the past, you may find the commander interface more familiar. After you’ve installed WinSCP, start the program and it will immediately bring up the Login window to start an SFTP session.
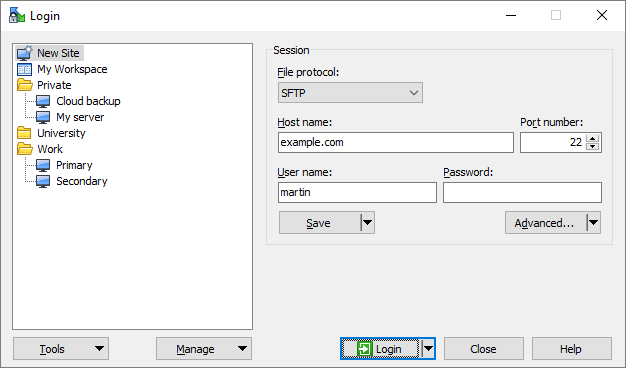
In Host name you can enter your Rockstor appliance’s hostname, or IP address. For User name enter the user you created and made owner of the SFTP share, and enter that user’s password. Click the Login button, and it should open a session. Your Rockstor server will have a self-signed certificate which may generate a warning the first time you connect. If you are sure you’re connected to your server, accept the certificate. Once the session is established, you’ll be viewing the interface you chose during install:
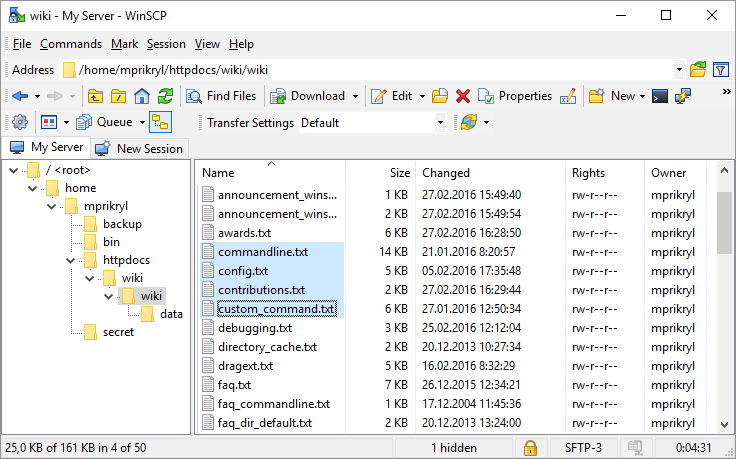
The Explorer interface, which provides a view of the files on the SFTP share in familiar Windows Explorer-like interface:
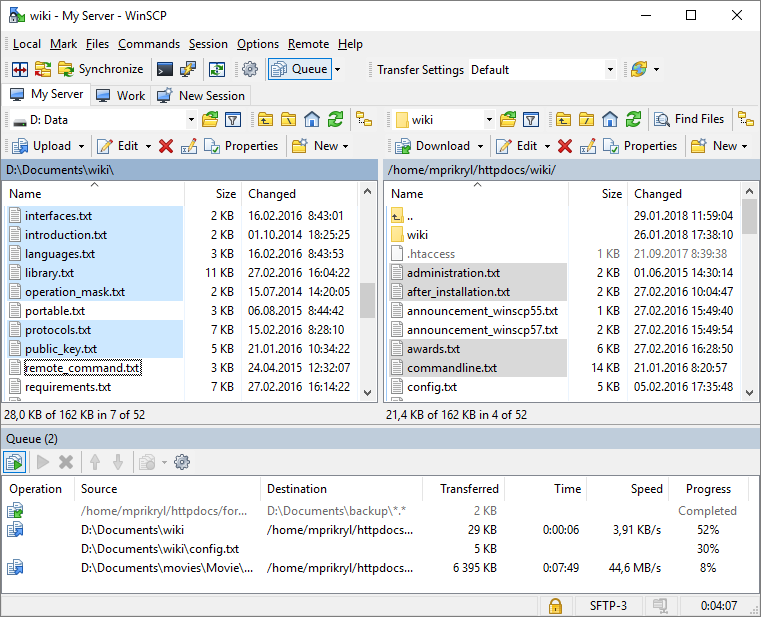
Or the Commander interface, displaying local files on the left, and server files on the right atop of status window on the bottom:
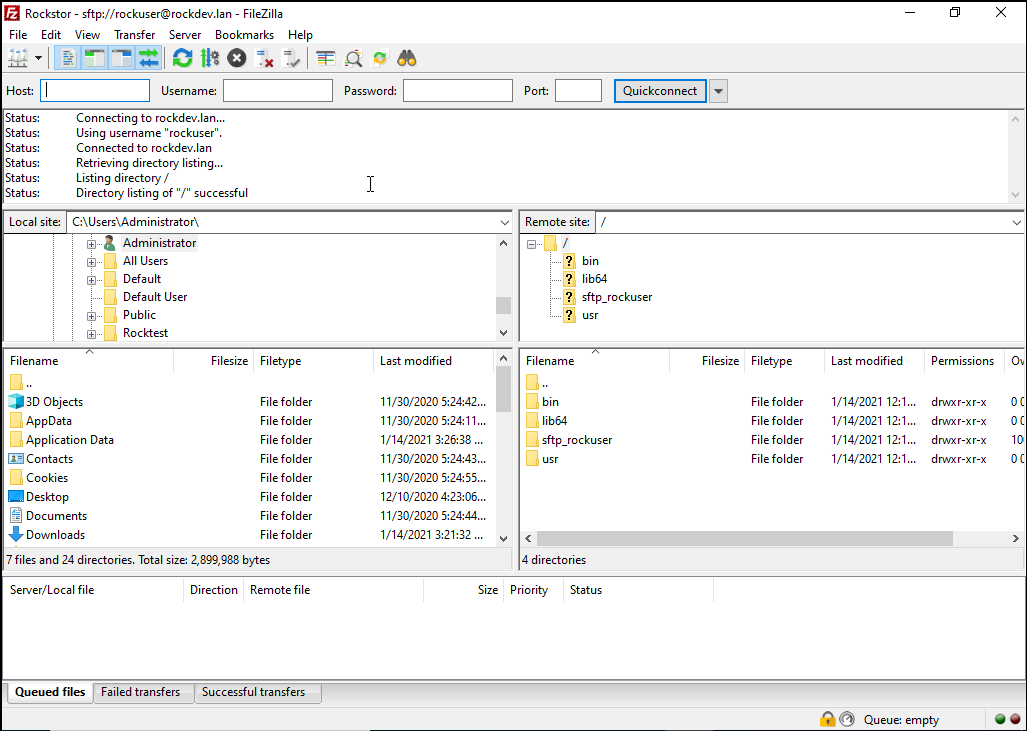
SFTP Access From FileZilla
FileZilla is a free open-source (S)FTP client distributed under the GNU General Public License (GPL) version 2.
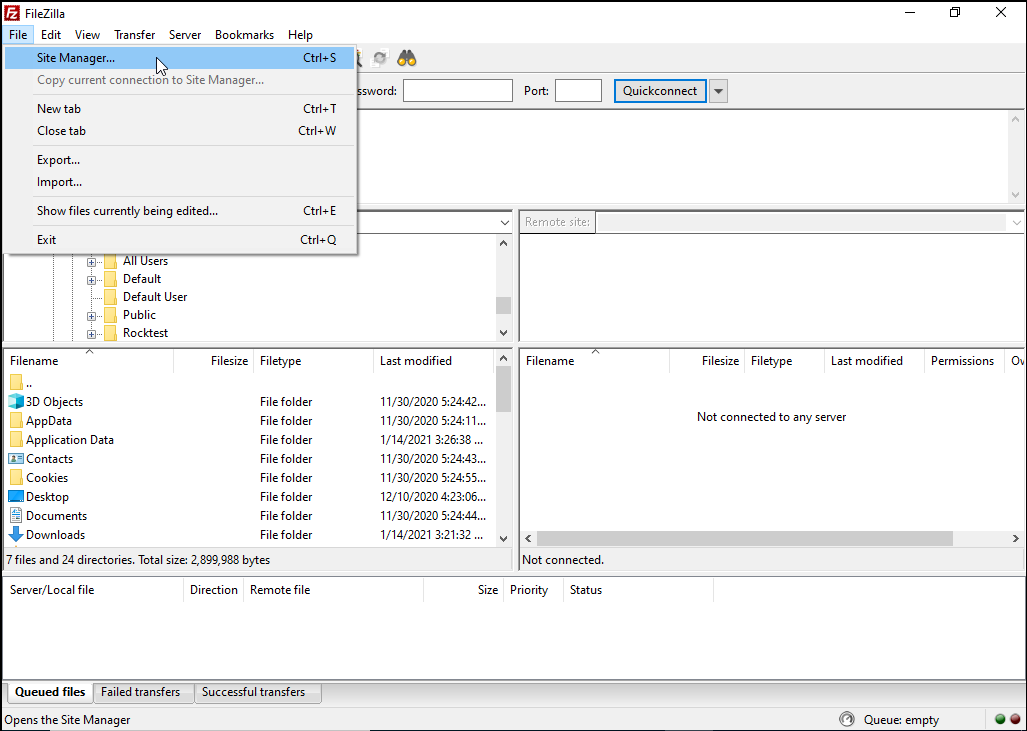
To begin, we need to add the Rockstor server as a target Site. To do so, open the Site Manager by clicking on File > Site Manager:
Then, click the New site button to create a new site (named Rockstor below), and fill in the required information:
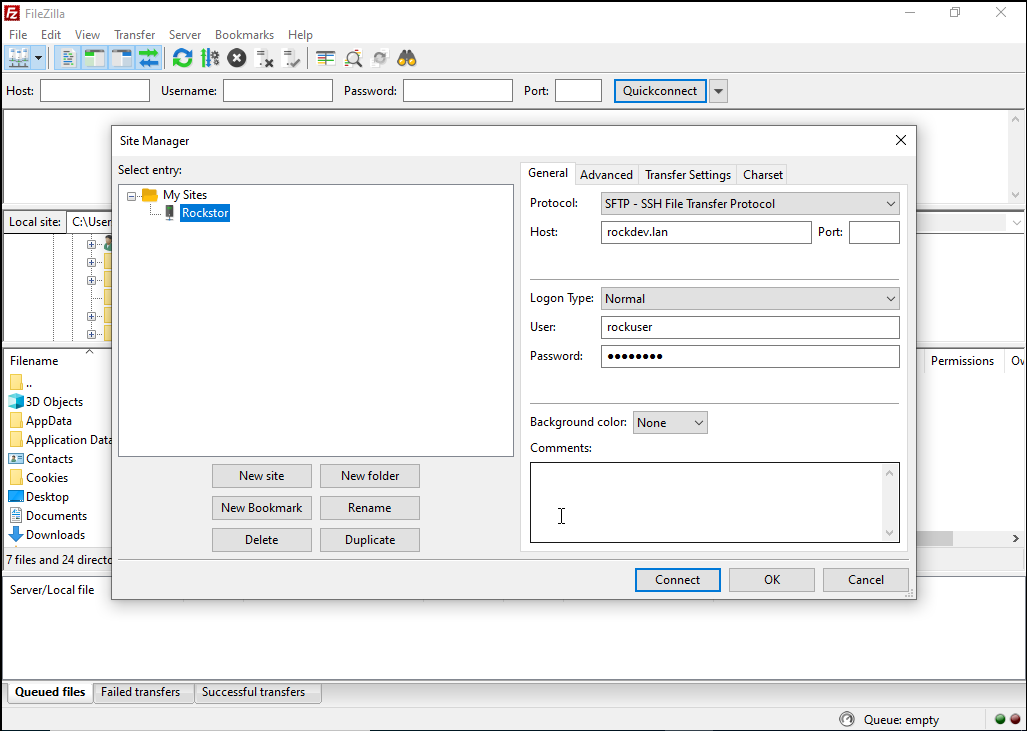
The settings should be filled in as follows:
Protocol: use SFTP - SSH File Transfer Protocol.
Host: use the hostname of your Rocsktor machine if your network supports name resolution, or its IP address instead.
Port: can be left empty.
Logon Type: use Normal.
User: name of the user owning the share to be accessed.
Password: password for the above user.
Once all settings are correct, press the Connect button to save the changes and open a connection to this Site. Note that upon first connection, FileZilla will request to confirm the server’s fingerprint. You should now be able to successfully connect to the SFTP share hosted by Rockstor and transfer files between it and your local Windows machine.