Rockstor in Virtual Machine Manager guide
Warning
This How-to was based our now legacy/unsupported v3 CentOS based variant. However a very similar procedure should work for our v4 “Build on openSUSE”. N.B. support for virtio devices is conditional on them each having a unique serial number assigned.
A quick and easy way to evaluate Rockstor is by using a virtual machine. A virtual machine instance of Rockstor is also invaluable as part of a build environment.
If you are using a Linux desktop you have the option to use the GNU/Linux KVM and its associated GUI Virtual Machine Manager.
A note on networking
In the following guide the default KVM networking arrangement is used (NAT); this is to minimize the network reconfiguration required on the host and essentially sets up a virtual router with NAT that allows all virtual guests and the host to communicate with each other.
However this arrangement doesn’t allow for the guest virtual machines to be
accessible from other machines on the hosts lan. This arrangement is
sufficient for trialing Rockstor from the host machine via its IP or via its
<hostname>.local but will hamper services that require lan name
resolution.
Can I run the Linux KVM?
This depends on you CPU having the appropriate capabilities; to find out on an Ubuntu desktop you can install the cpu-checker program with the following command:
sudo apt-get install cpu-checker
Once this program is installed you can execute the following command in a terminal:
kvm-ok
The response should indicate if KVM is possible. Another less friendly but more portable way to establish KVM capability is:
egrep -c '(svm|vmx)' /proc/cpuinfo
A non zero response from the above command should indicate KVM possibility.
Installing KVM and its GUI
This is Ubuntu specific but may well work on other debian derivatives:
sudo apt-get install qemu-kvm libvirt-bin bridge-utils virt-manager
N.B.: it is required that one logs out and then back in again after the above installs as then your linux user is able to acquire their new group privileges.
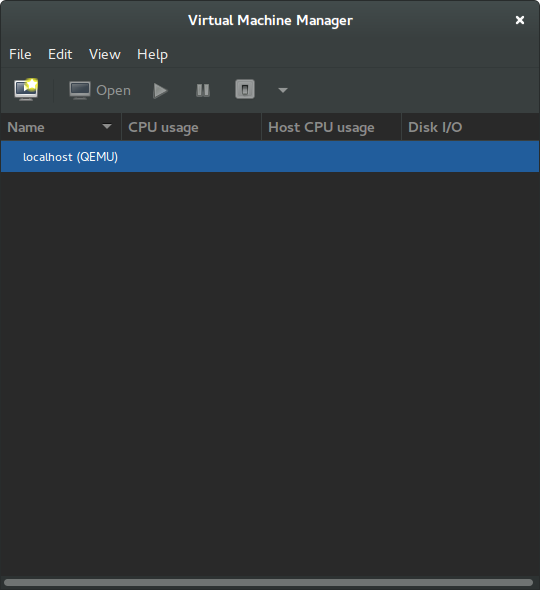
Setting up a KVM for Rockstor
The easiest way to do this is by using the KVM GUI “Virtual Machine Manager” or
virt-manager via command line.
This graphical assistant is fairly intuitive and can get a virtual machine up and running by just following the built in “Create a new virtual machine” however if you like to be able to name your drives/volumes then creating them first will be necessary.
Creating the storage volumes
Double click on the localhost (QEMU) and select the storage tab
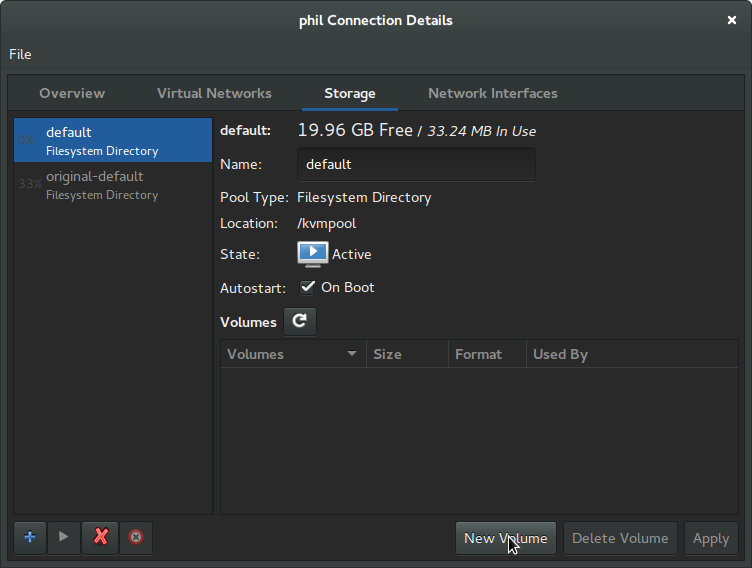
Click on the New Volume button and create the system drive volume eg
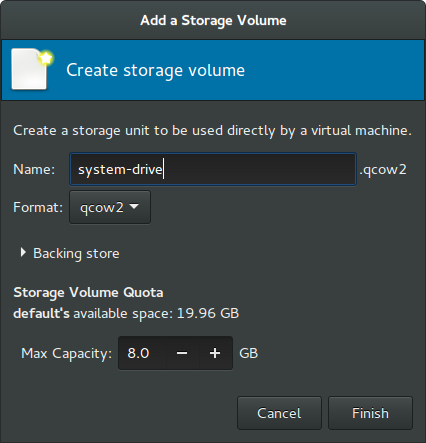
In the above we used the provided defaults but named our volume “system-drive”. The 8GB size coincides at time of writing with the suggested minimum for Rockstor’s install drive.
Current Minimum system requirements
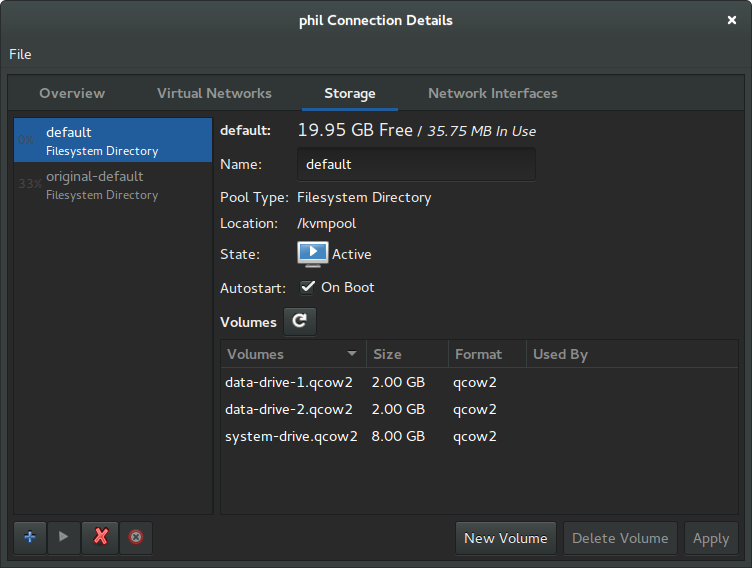
Using the same procedure we can add additional volumes for use by the Rockstor virtual machine as it’s data drives. The following illustrates the result of adding another two volumes; each of 2GB.
Close the above dialog and return to the main window of Virtual Machine Manager to creating the virtual machine that will use the storage volumes we have now defined.
Creating the Virtual Machine
Starting the “Create a new virtual machine” wizard either from the File menu or the icon bar should show the first of 5 configuration dialogs.
Step 1 - Method of install ie via iso

Step 2 - Select our install media; in this case the Rockstor-#.#-#.iso
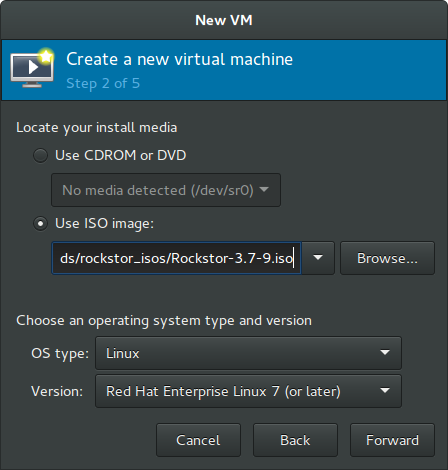
N.B. In the above dialog we must also select OS type Linux and Version Red Hat Enterprise Linux 7 (or later)
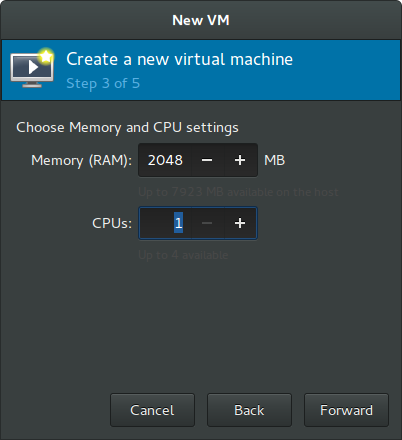
Step 3 - Set the RAM / memory (minimum 2048MB) and CPU count eg 1 or 2 on a quad core host
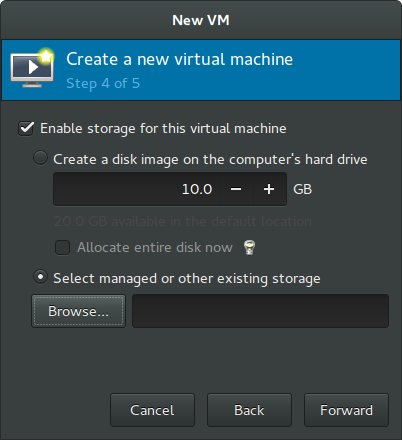
Step 4 - Set the system drive to install Rockstor on. As we have already created our named volumes tick Select managed or other existing storage. Then, click the Browse button.
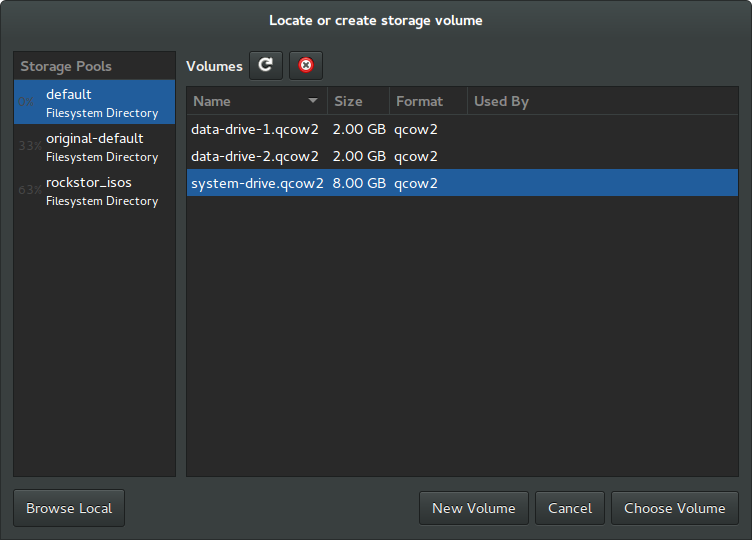
We should then be presented with the following dialog where we can select our pre-prepared system-drive
Step 5 - Set our virtual machine’s Name and tick “Customise configuration before install”
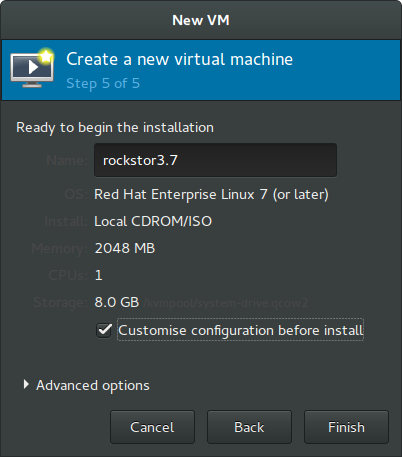
As we ticked customize we get the chance to modify our virtual machine prior to its first launch
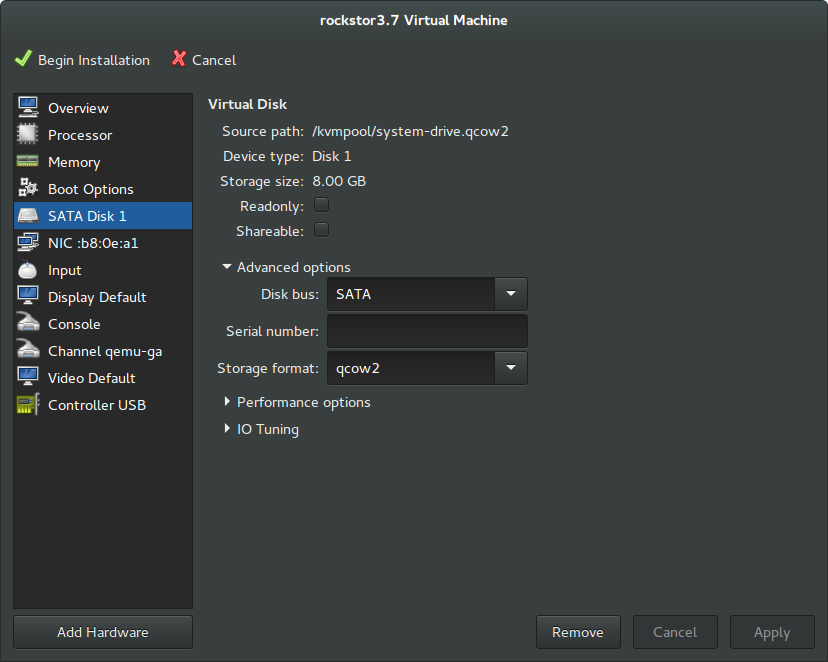
N.B. in the above we have changed what was Disk 1 to the required SATA Disk 1 by changing its “Disk bus” in Advanced options to SATA and then clicking on Apply. This is necessary as otherwise the Red Hat Kickstart semi-automated installer process can fail to identify the default KVM drive type of vda (a virtio block device).
If during Rockstor installation you receive a “Specified nonexistent disk sda in ignoredisk command”, then look to this last setting.
Virtual Machine Creation Summary
So in the above example we have added a single system drive/disk to our virtual machine; the system-drive. This is good practice and can simplify the install; as well as removing the possibility of accidentally installing onto existing data drives.
The Rockstor Install
It only remains for you to boot the above configured virtual machine via the Begin Installation button in the top left of the last dialog.
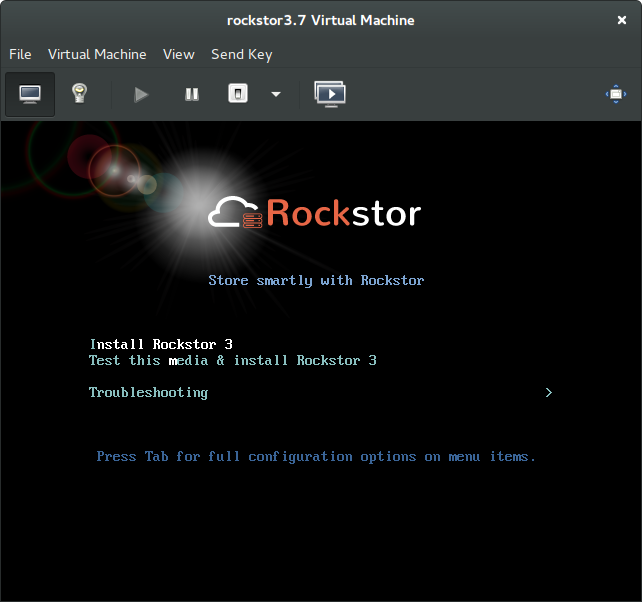
Selecting the Install Rockstor 3 option via the Return Key should result in
N.B. If you do not see the whole of the graphical install screen like in the above image you can select View and then Resize to VM
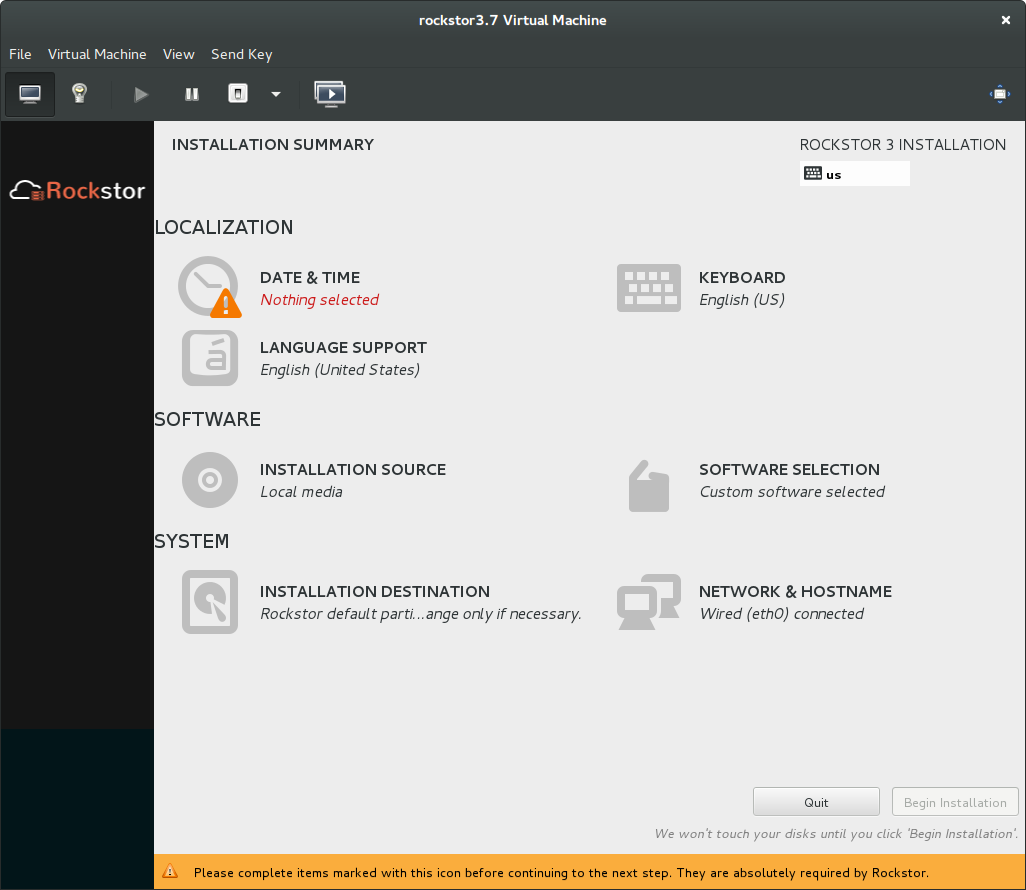
Following the graphical installers prompts should result in a problem free install and once complete the virtual system should rebooted and the initial minimal configuration can be done.
Note that the installation media will be automatically removed from the virtual machine during this first reboot; there by avoiding booting from the iso image again.
Initial “first boot configuration”
The rest of Rockstor’s configuration is done via it’s Web GUI interface; simply point you browser as the indicated ip address. The resulting page should look something like the following

Note that getting to the above page may first require adding an exception in the browser for the default self signed certificate used. It is possible to add a certificate later once the initial setup is complete.
In the above image the hostname has been entered as well as the user (admin) and their associated password.
Next we are greeted with the following:
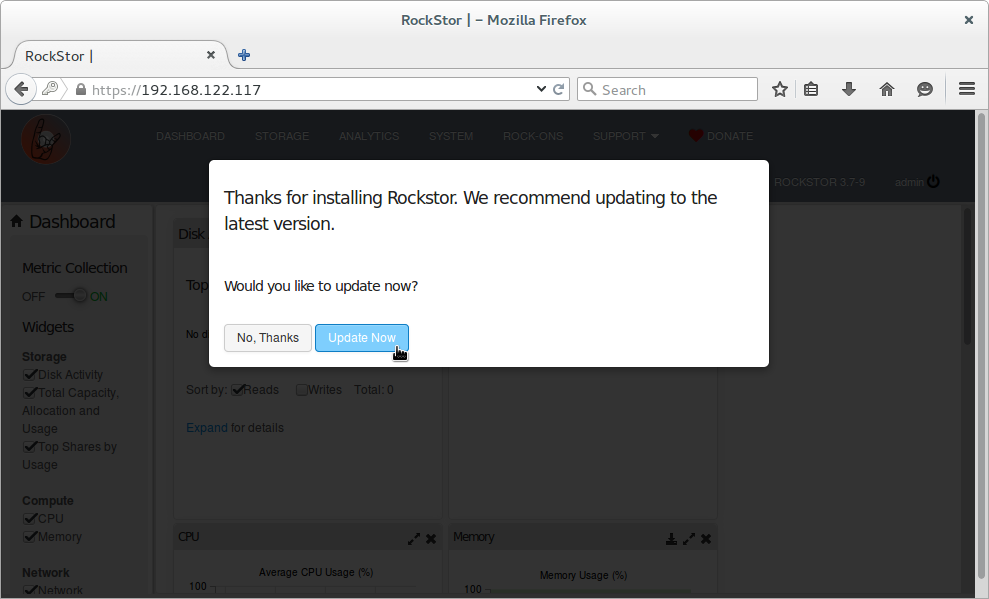
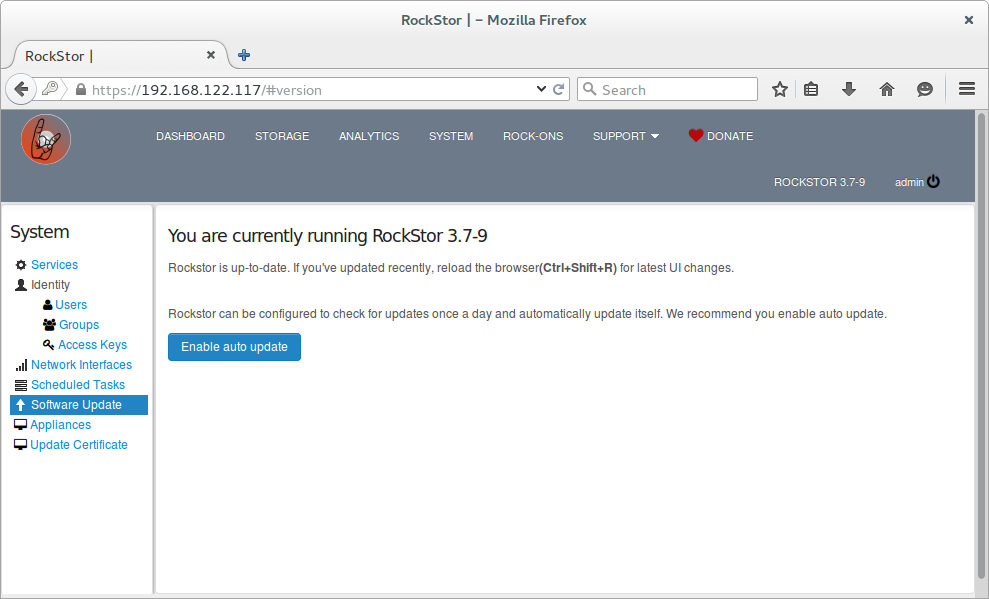
Going with the default of Update Now gets us to:
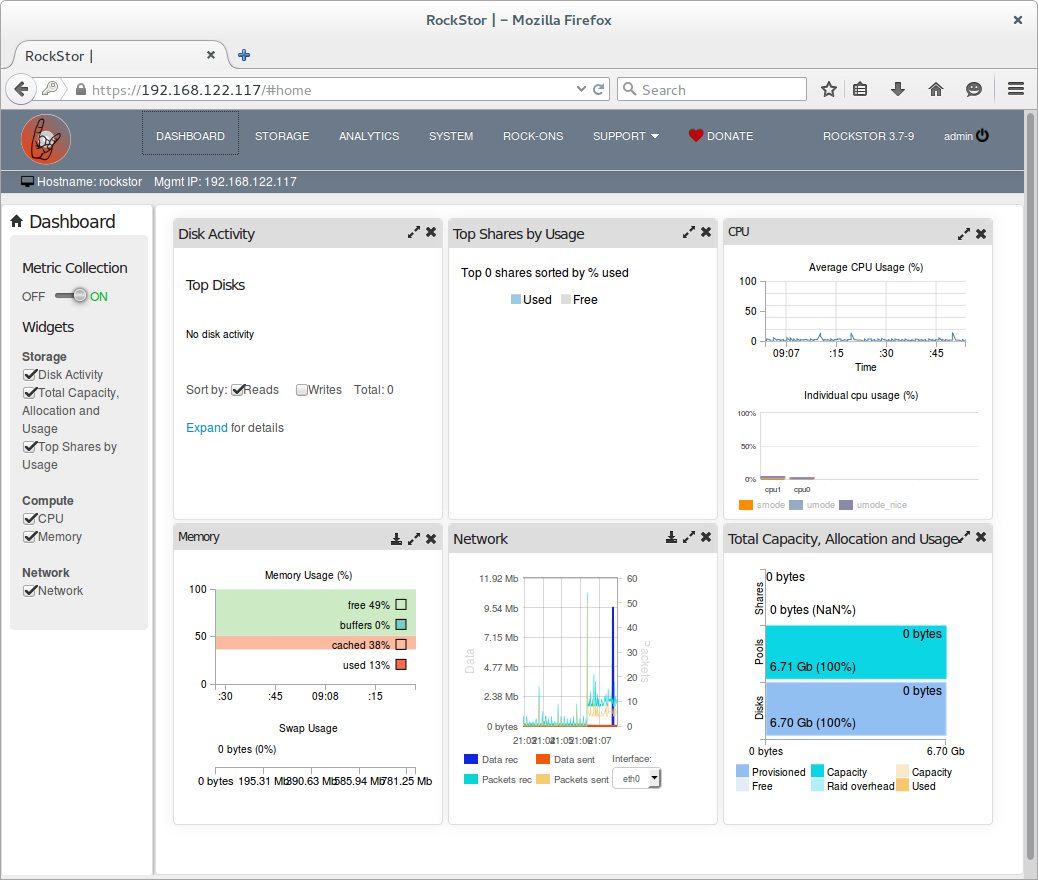
And finally the dashboard, prior to adding the data drives
Adding the data drives / disks to the Rockstor VM
Although Rockstor can make use of the unused space on the system drive (by creating shares within the rockstor_rockstor pool) this is strongly discouraged and limits what btrfs options are available; ie resize, compression, and deletion are not allowed.
So we need to add the data-drive volumes we created earlier to the newly created virtual machine. In some KVM configurations it is possible to hot-plug additional drives but this was not an option for me; so shutting down your Rockstor virtual machine first is advisable.
Start by double clicking on the Rockstor VM listing within the main window of Virtual Machine Manager:

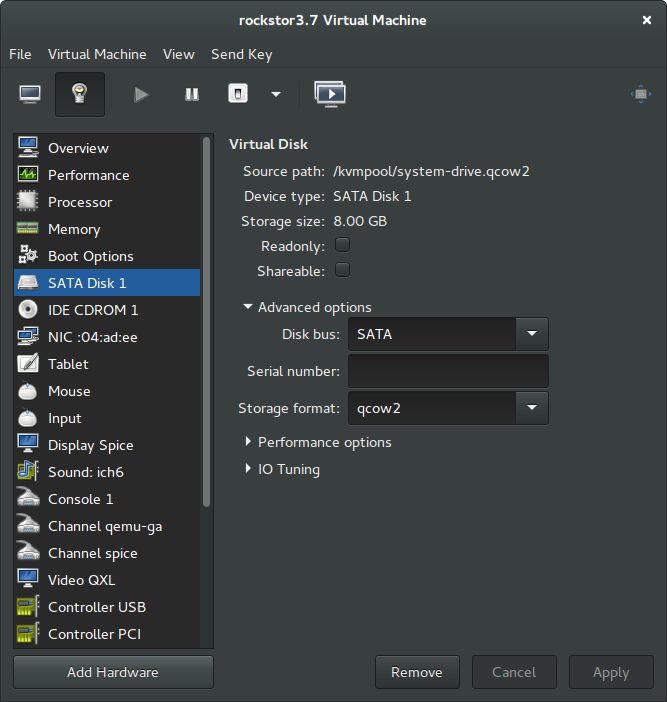
The resulting dialog once you select View then Details or clicking on the lightbulb icon will be similar to:
To add our previously prepared data volumes as virtual drives we Add Hardware and go through the same process as when we added the system-drive; only this time we select our data-drive-1 and data-drive-2 volumes, each in turn.
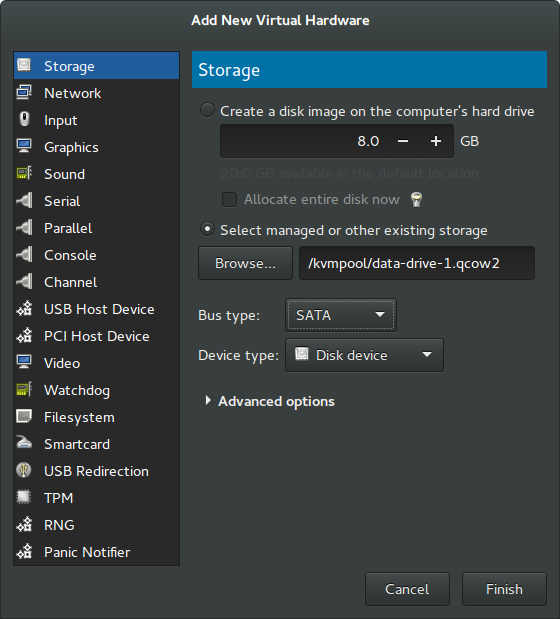
The above image shows where Select managed or other existing storage has been selected and the Browse button has facilitated the selection of data-drive-1. N.B. it is important to select Bus type of SATA as then our drives appear as regular sata drives to Rockstor, virtio drives, although more efficient, are currently not supported.
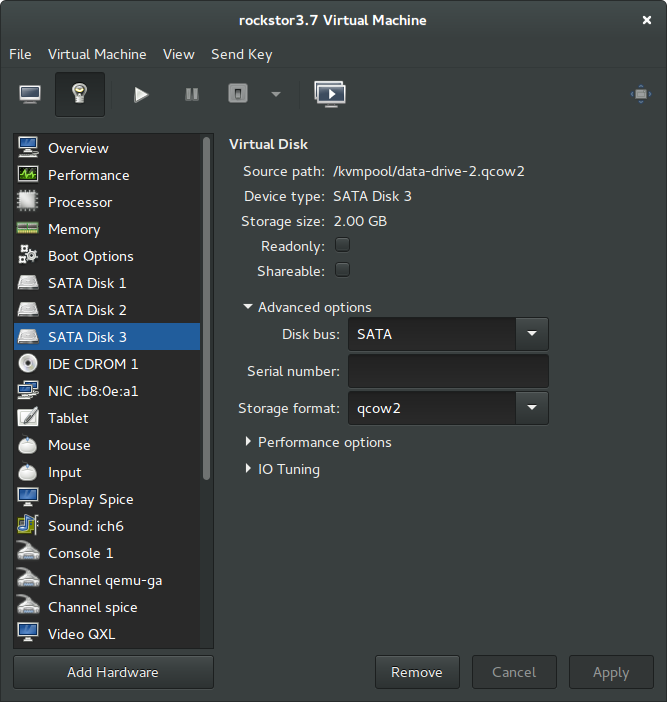
Once both drives have been added our virtual machine details should look something like:
We can now boot our Rockstor virtual machine with its two shiny new 2GB virtual SATA drives for experimental / developmental purposes.

