Reinstalling Rockstor
When reinstalling Rockstor or when the Installation Destination disk is not blank it is necessary to take a few more steps within our legacy installer to prepare the system disk. However, all installers after version 4.0.0-0 behave identically irrespective of system target disk content. For our non-legacy installer behaviour, install or re-install, please see Rockstor’s “Built on openSUSE” installer. But for both installers, note the following:
Prior to starting your reinstall, if you have a working installation you may want to Create a Configuration Backup and download and save the file so you can restore that configuration after the reinstall is complete. For the non-legacy installer re-installs you, can skip to Data Import later within this how-to.
Wiping the system disk
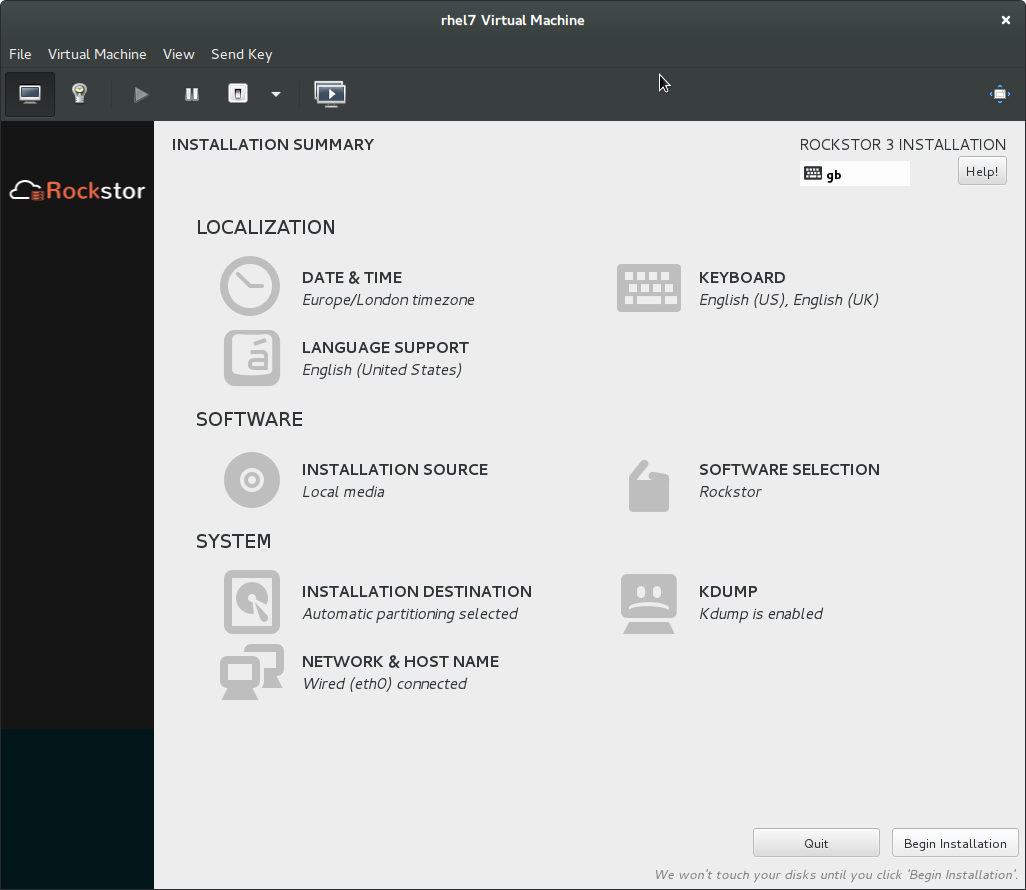
As Rockstor’s semi-automated installer expects a blank disk, we must arrange this whenever the system disk already has partitions on it. This will be evident from the Installation Summary screen by an exclamation mark next to Installation Destination.
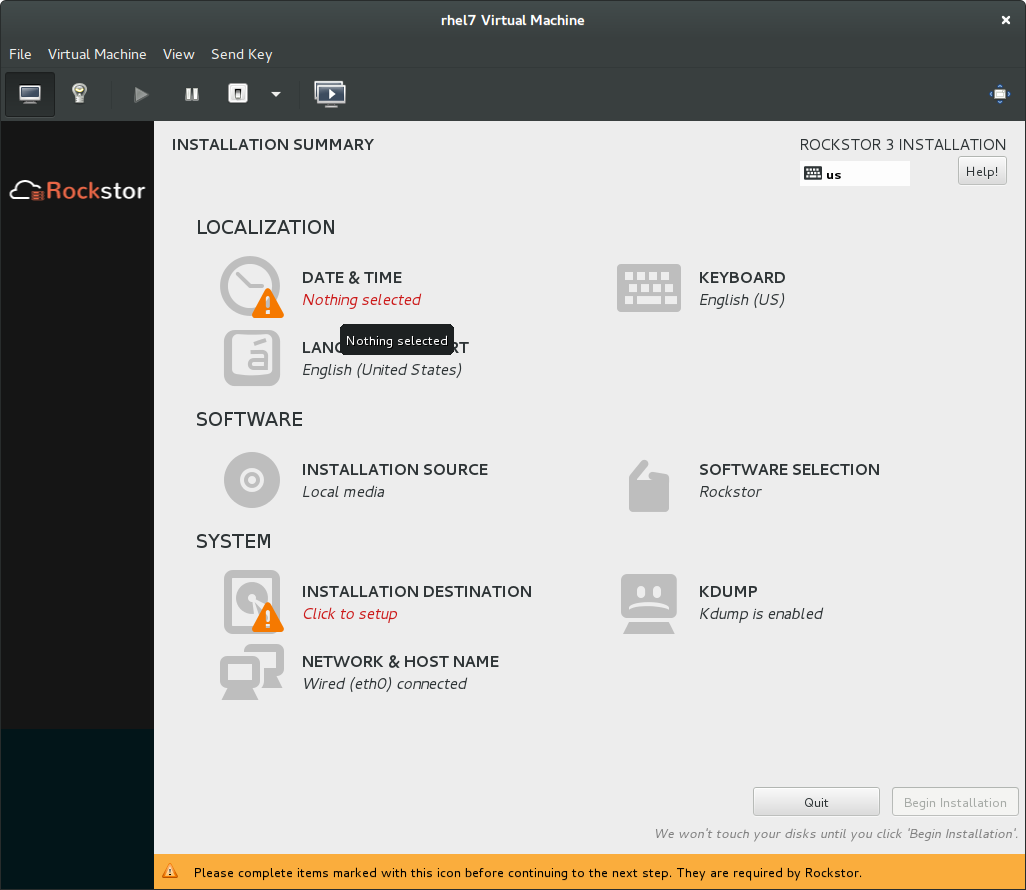
Note in the above we have attention required in Data & Time and Installation Destination. Date and Time simply needs to know your location to set the timezone.
When Selecting the Installation Destination menu option, we see the following:
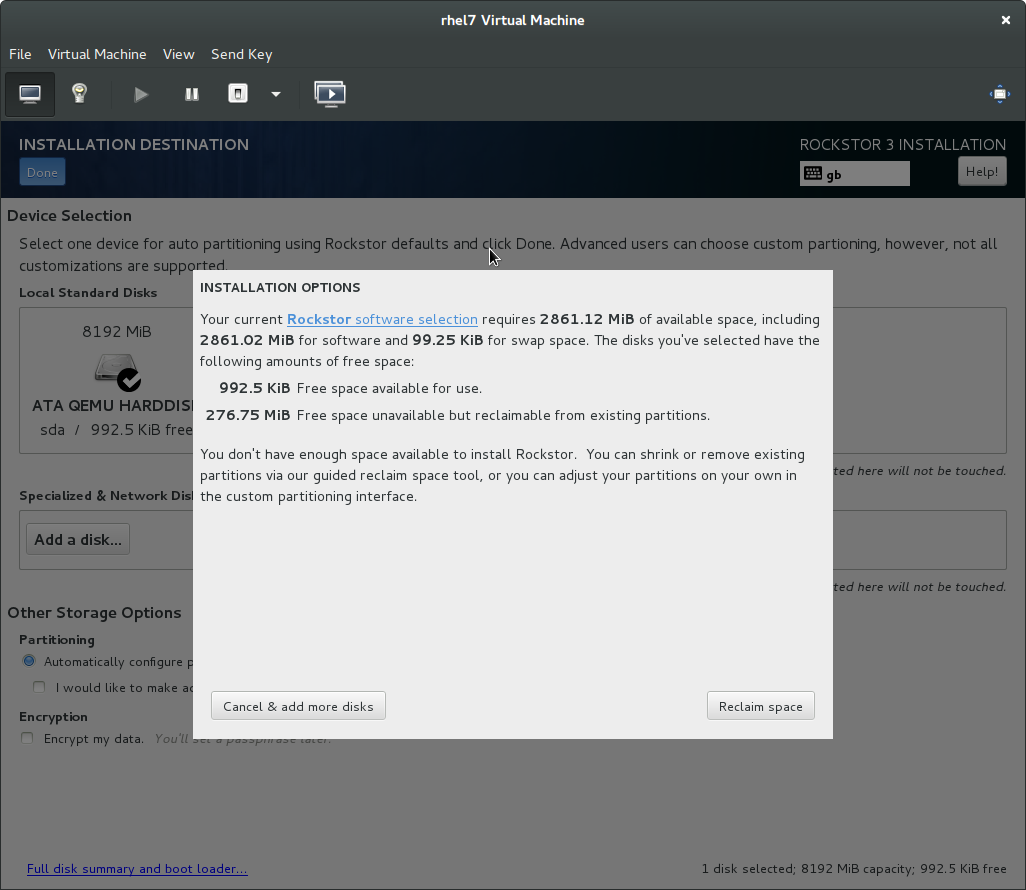
Note how there is only 992.5 KB free space due to a previous install.

Ensure that the correct disk is ticked. Rockstor, with default boot options, will only show sda but if you see other disks due to custom boot options, be very careful with where the tick is; there should be only one disk ticked.
Use the default Automatically configure partitioning
After pressing the Done button we get the following Installation Options dialog. Use the Reclaim Space button.
Reclaim space
On the resulting Reclaim Disk Space dialog, after assuring yourself that this is in fact the correct disk, click on the Delete all button.
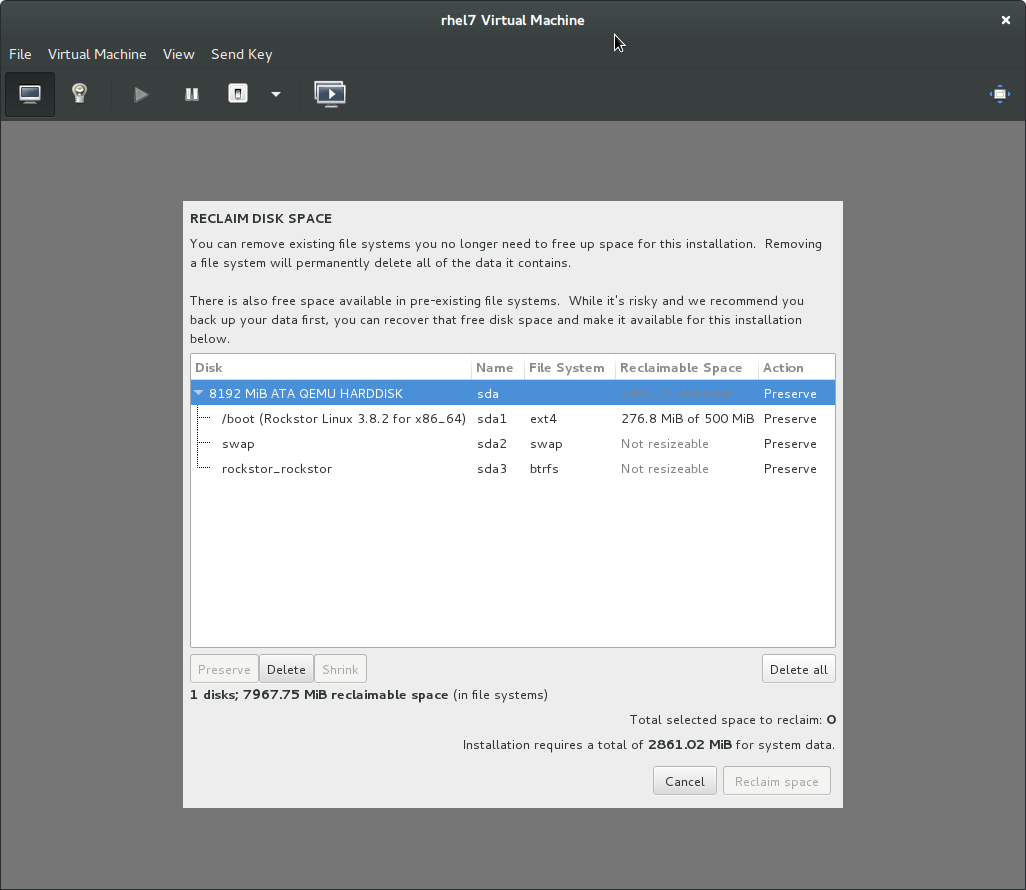
Delete all
Note now how the Action column entries are all Delete and the Reclaim space button has become available:
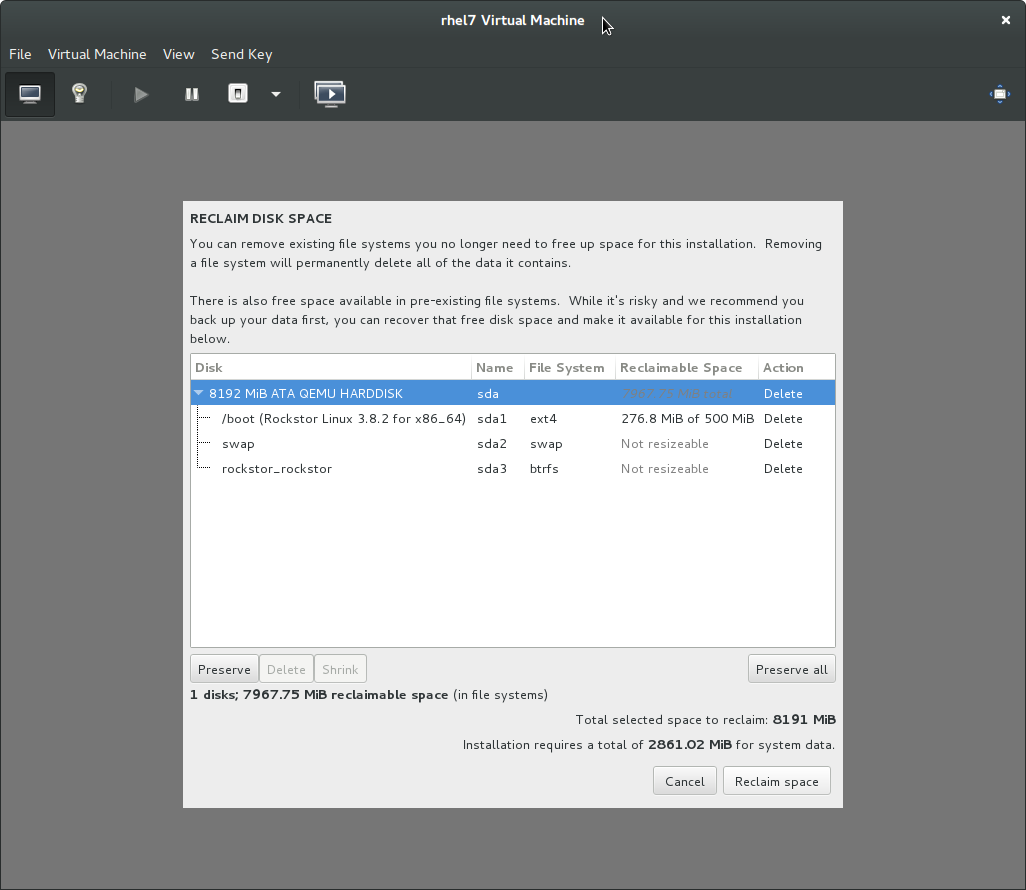
Click Reclaim space if you are certain this is the correct disk.
We should now be back at the installation summary screen where we can Begin Installation as normal.
We are now ready for a regular Installation as the system disk is now blank.
Data Import
Once Rockstor has been reinstalled and you have applied the updates via the automated prompt in the WebUI and rebooted if prompted to do so, you can import the data that was present on your previous Rockstor install’s data disks; assuming you had separate data disks of course.
N.B. given this is a new install it is advisable to reboot anyway to make sure all is well before doing the data import, this will ensure you are using all of what has just been updated.
Data import is initiated by using the tiny down arrow icon next to a pool device member’s name on the Disks table / page of the Storage section.
Please see the Import BTRFS Pool section of the Disks page for details and note that when importing via a partitioned pool member, additional configuration is required, but only for the first partitioned pool member.
N.B. only one partition is supported per drive.
This process is intended to import the following:
Pools
Shares
Snapshots
Restoring Configuration
If you have previously Created a Configuration Backup and downloaded the relevant file then you can now restore that configuration.
