Rockstor USB install disk using Gnome Disks
Many popular linux desktop distributions including Ubuntu, Fedora, and many others, include the gnome-disks program by default and as such have a built-in graphical way to create a Rockstor USB install disk from the downloadable iso file. What follows is a step by step guide of this process. Please see the Making a Rockstor USB install disk in our Quick start guide for other tested methods.
Steps required
First download the latest Rockstor iso image then insert your USB key.
In Nautilus (the file manager) Right Click on the Rockstor iso file and navigate to Open With then Disk Image Writer.
Select the USB key as the Destination.
Double check you selection of destination device and Click Start
The following images and notes indicate the above steps in more detail.
From within Nautilus the file manager Right click on the Rockstor iso to invoke the Disk Image Writer.

Select Disk Image Writer from the right click menu.
Here we see the Restore Disk Image dialog, we need to select our USB key.
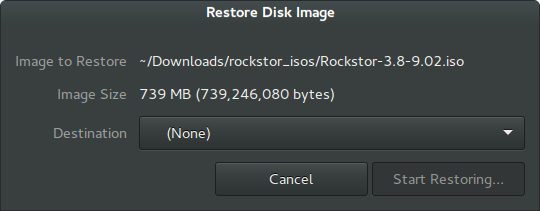
Note that this dialog is part of the Disks program that was automatically started, this can be seen in the next image.
Below a 16 GB innostor device was selected from the Destination drop down. Notice that we receive an indication of the destination device being larger than the source image; this is for information only and is not a problem.

The Start Restoring button should now be available.
A confirmation dialog should now be displayed
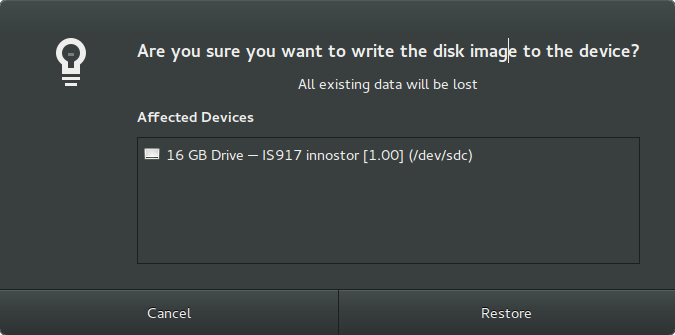
Note the Affected Devices information and size in the warning before proceeding with the Restore
Depending upon your choice of USB disk and port capability the restore process may take anywhere from a few seconds to several minutes. A progress bar is displayed along with an estimate of the time remaining.

Upon completion safely eject / remove / unmount the USB device before physically removing it, although it may very well not be mounted. This could be achieved using the eject button visible in the above image (in the window header)
